#32: Microsoft Designer gets everywhere

clip_image002

Assuming you haven’t woken from cryonic stasis (leaving aside all the practical difficulties of doing that) then you’ll already know of the hallucinatory ChatGPT and its image-creating sidekick, DALL-E, which will spit out a computer generated image from a text-based description of what you want.

Predictably, there are many memes on whether AI is a good thing or not, along with worries that it’s coming for your jobs/freedom/happiness etc. In many ways, it’s just another wave of technology which is certainly impactful, but its benefit will be seen by how we creatively embrace it.

clip_image003

Also doing the rounds is the trope of “I want AI to do my laundry” which is poignant if not really a new thing (see Keynes c1930, or Bertrand Russell’s “In praise of Idleness”, c1932). Technology is invented to supposedly give us more time but often displaces one form of work for another. Now, AI prompt engineering will be a creative skill, to a degree replacing the need for designing, drawing or painting skills.

Meanwhile, Microsoft has been busy embedding DALL-E technology into other apps and services, broadly packaged under its “Designer” branding. You can generate images for embedding into LinkedIn articles, for example …

clip_image005

… though with some mixed level of success, depending on what you want…

clip_image007

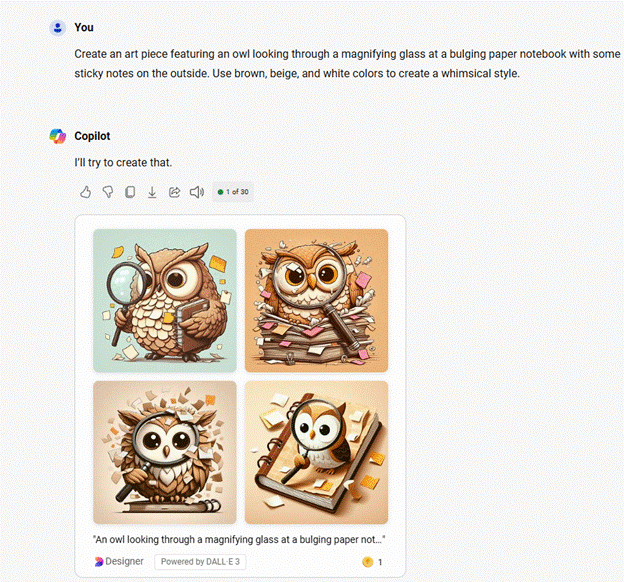
Alternatively, just go straight to the Copilot prompt…

clip_image009

Even the venerable Paint has gotten a new Image Creator function which does much the same thing, though annoyingly defaults to a 1:1 aspect ratio, regardless of the orientation of the canvas. In the main Copilot/Designer UI there is a little icon to change the ratio of your image from square to landscape, however it ends up generating a new image entirely.

clip_image011

Restyle it out

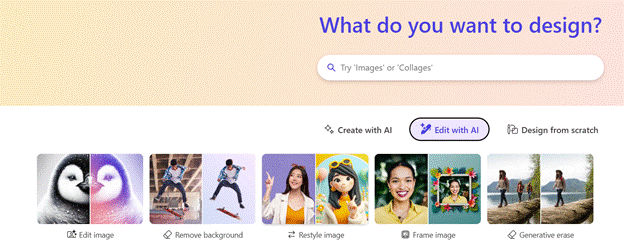
Remember all those early 2000s makeover TV shows which gave frumpy looking people another view on what to wear? Well, there’s a Restyle capability in Designer that’s so much fun to play with, you could easily spend the rest of the day mucking about with pictures to see what selfies look like in art style, how the dog would be if made of Plasticine, and so on…

clip_image013

Take your source image…

clip_image015

…then choose one of a variety of styles, and be prepared for outright weirdness or outright flattery…

clip_image017

Right, that’s enough of the day wasted. Get on with your work!

#31: Easy and Excel-lent Data sources

clip_image002

Most people who have spent time using Microsoft Excel will realize that it probably has more capabilities than they’ll ever understand, much less use. There are so many functions used to collate, display and interpret data that it’s no wonder people turn to using it for all sorts of things.

There have been numerous attempts to make user-friendly data tools for Excel, from web-scraping 3rd party sites to the short-lived Money in Excel for American users which bit the dust before it was barely out of diapers.

More recent releases of Excel include several Linked Data Types which can retrieve and manipulate data from “reputable sources of data, such as Bing”… (which, incidentally, had its 15th birthday recently). Companies with suitable data governance can expose internal info for analysis, or regular end users can get started with share prices, currency conversions and geographical data.

clip_image004

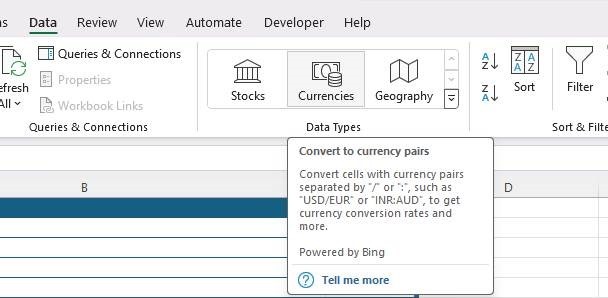
In the Data tab in the current versions of Excel on multiple platforms, you’ll see 3 or 4 types of data that can quickly be inserted – they will perform a lookup on external information and return a data set in the background which can be displayed and otherwise interacted with using formulae, lookups and other standard data tools in Excel.

clip_image006

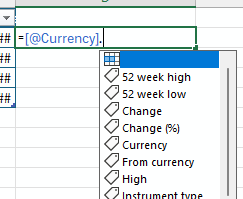
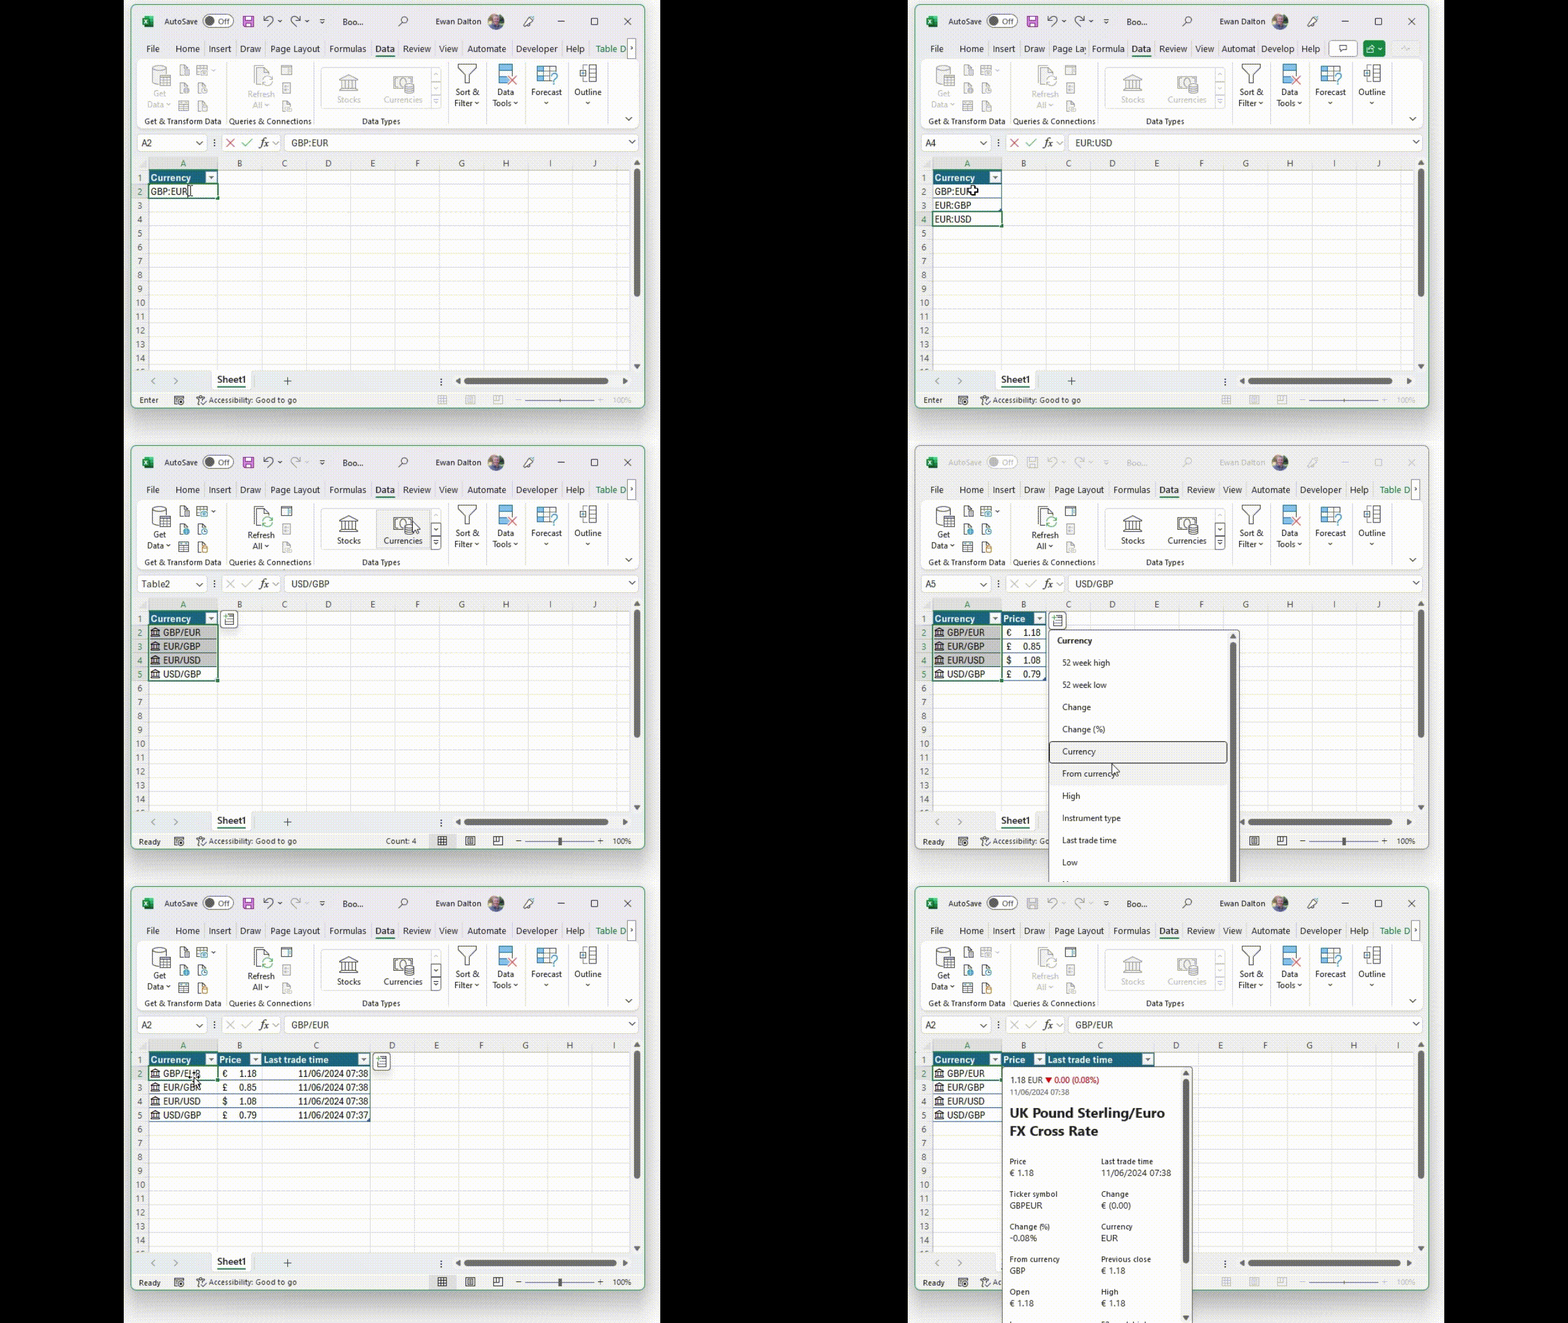
Getting real-time data is pretty straightforward – create a blank table with a single column in which you’ll enter your key data items that you want to expand on – for currency conversions, it would be a pair of currency symbols (USD:EUR or GBP/USD etc) that you then select and mark as Currency from the data tab. That then lets you easily add other columns for specific lookup data, and that can be referenced itself through other formulae too.

clip_image007

Stock lookups work similarly, by entering the ticker symbol in one column and potentially going through a matching exercise to find the right one. Handy, if you have a workbook for calculating when you can stick it to the man and retire to a patch in the Tuscany hills: you can automatically look up the stock values and convert their currencies too, if required.

clip_image009

There’s some location stuff as well, invoked by entering city or area names; it’s more text-based reference info which is returned, though it might be possible to feed some of the data into a Map Chart for further visualization.

#30: Snipping Smarter

clip_image002

Wclip_image004indows’ Snipping Tool, used to capture an area of the screen, has been around for a long time in various guises, even threatened with cancellation at least once. Invoking the tool by pressing SHIFT+WindowsKey+S or just hitting the PrtScn button (if you have one) now displays a small dialog at the top of a dimmed screen.

You can choose to capture a static image (of a part of the screen, or the whole thing) or a record a video of a marked section of the screen, optionally with your own commentary – useful for sharing a quick “how to” video.

Another way of capturing the entire screen is to press WindowsKey+PrtScn, which can be useful when trying to grab menus and things that might disappear if you tried to interact with them – like the first image above, since the screen grab menu itself will disappear as soon as you click the mouse button.

As well as copying the snipped area to the clipboard, an updated Snipping Tool from about 18 months ago also saved them to a Screenshots folder, so it’s easy to go back and fish them out later. See 665 – Mind your screenshots for more details; it’s worth keeping an eye on that Screenshots folder so it doesn’t get overly large and/or contain stuff that you might not want to keep.

REDACT THE gggg TEXT

Some further updates to Snipping Tool have been happening of late; there’s some nice functionality which lets you extract text from the grabbed area to the clipboard (as paste-able text rather than an image), or to redact certain bits of the screen so as to preserve potentially confidential info.

clip_image006

The Quick redact feature tries to identify some data types, but to manually scratch it out, just select the text you want to hide, right-click and choose Redact.

clip_image008

When you’re happy, click the Copy button on the top right

clip_image010

And that will put the fully redacted version into the clipboard, either replacing what was there before or adding it to the list if you have Clipboard History turned on.

clip_image012

Another newish addition is the quick ability to feed your screen grabbed image to the Visual Search in Bing, effectively doing a reverse image lookup – just look in the menu on the top right.

clip_image014

#29: The power of CTRL

Designer (7)The familiar computer keyboard has evolved over decades, even though some languages have obstinately different layouts; Germans have QWERTZ and French users have AZERTY, while Brits used to their usual keyboard might struggle to find the backslash on an American machine, and accidentally hit Enter when looking for the hash key.

clip_image002

Most keyboards feature control keys on the bottom corners; designed as a “modifier” to be used in conjunction with other keys to activate certain commands, there are some well-known combos like CTRL+C and CTRL+V for copy and paste. There are outliers – German keyboards have Strg instead of Ctrl, and even an obsolete ISO standard says the key could be marked “”.

There are some occasions when the Control key is not just a straightforward modifier; aside from using Sticky Keys to keep it pressed, one somewhat hidden feature in the Edge browser turns Ctrl to good effect, for opening an image in a zoomable overlay window.

Many images embedded in web pages are much bigger than you might think; the source picture could be something like 2000×1500 pixels in size, but when displayed on the site, it’s reduced to 640×480. In such cases, you can use the CTRL key to magnify the original image without having to navigate away from the current page.

If the Edge window is in focus, move your mouse cursor over an image and try tapping CTRL twice; if the site can support it, you’ll see the image displayed in a pop-up window that lets you zoom in out (with the mouse scroll wheel or by stroking your laptop touchpad).

clip_image004

If you have the PowerToys addon pack installed, you may also have Find My Mouse enabled, and that too uses one of the Control keys as its activator. Happily, if a little confusingly perhaps, both can co-exist so you’ll expand the highlighted image while temporarily spotlighting where your pointer is.

clip_image006