
Around a year ago, old-school Tip of the Week had a “2025 Enshittification: part 1” post which looked at how online services routinely drop features that people like because it suits the provider to not sustain them. It’s high time to revisit the topic, specifically looking at changes being made to online mapping services and one popular document scanning app.
In truth, if you’re going to rely on a free service, be ready to expect the provider to muck it up for you. If you like to look at your old house on Google Street View, best head over there now and screengrab it as some day they may decide to stop storing previous captures or something.
It feels like it’s only a matter of time before Amazon starts making Alexa a paid-for service, or subsidises free use for telling you the weather or play the radio by playing “would you like to buy a new Carlos Fandango umbrella to protect you from tomorrow’s rain?” inline ads.
Microsoft Shutters Lens
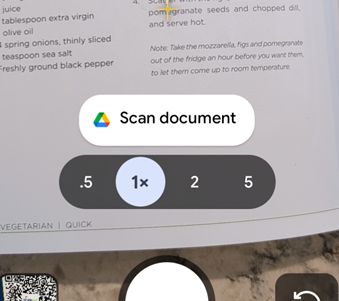
A bit niche, maybe, but Microsoft has been offering a scanning app for smartphones for years. Originally called Office Lens and available for Windows Phone since 2014, later rebranded (of course) Microsoft Lens and even gaining “PDF Scanner” to tell you what it’s primarily for. It was previously discussed in old ToW #682. There used to be a PC app as well as iOS and Android ones, but that has gone already.


Despite nearly 1M ratings of average 4.8 and over 50M downloads on Android, its days are numbered. Rather than keep Lens alive, Redmond has decided to build some of its functionality into other apps, like OneDrive and/or OneNote. Sadly, neither is as simple, fast or fully-featured as Lens is/was. RIP.
Of course, there are plenty of other alternative scanning apps, including the built-in one for Android users, where you just point the camera at something which looks like a document and it’ll give you a shortcut to Google’s own scanning software which can detect page edges, bundle multiple scans into a PDF and so on. Since the scan feature is part of the Files app, you can go there and start a scan directly too.

At least Lens had a fulfilling life in the sun, unlike Viva Goals, a product of acquisition which likely cost Microsoft $200M+, and was deep-sixed after only 2 years.
Google “Privacy” copout
How many times have you seen a statement like “for your safety and security”, and realized that its primary goal is actually to make somebody else’s life easier?
Google had a neat feature, if you chose to turn it on, where Maps on your phone would keep a record of where you’ve been and upload to your Google account, so you could view your travels within Google Maps on your computer. Called Timeline, it was briefly covered in previous ToWs including the trend for apps to be replacing websites and not always to the users’ benefit.


Timeline was discontinued so you could no longer go to Maps and see where you’d been in the past. It’s tantalizingly still there in the menu today, but all it does is tell you to use the mobile app and offer more help on the activity controls.
The reason? For privacy’s sake, Google was no longer going to store all that info on its servers, rather the tracking data would only live exclusively on your primary phone. Sounds fine, unless you lose the phone and don’t have it backed up, or some other calamity occurs and deletes all the data.
Is this to protect the user? Or is it to protect Google from liability in case its service was somehow compromised, and the whereabouts of millions of people over time had been made available?
The DIY Alternative
If you like the ability to track where you’ve been, whether that’s to make your mileage claims easier or just to provide yourself an alibi when accused of being somewhere else, there are alternatives to Google Maps / Timeline though none are quite so easy to use. Self-hosting – as in running a server on your own network rather than relying on a cloud provider who might vanish tomorrow and/or start monetizing your data – is a favoured option for tin-hat wearers and honest folk concerned with privacy and/or who prefer to make their own lives difficult.
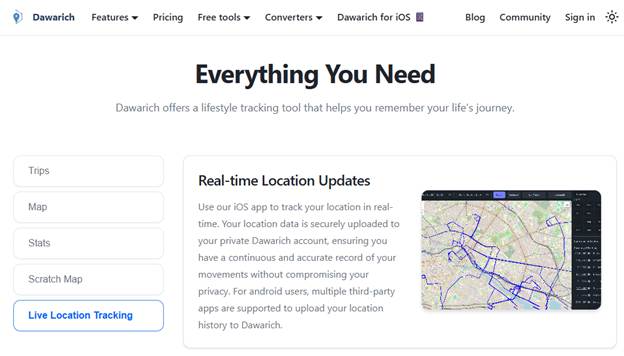
The leading alternative to Timeline is probably an open source project called Dawarich, available either as a subscription cloud service or software you can run on your own. If you have a Synology NAS device with enough oomph to run Docker, there’s an easy to follow* guide, How to Install Dawarich on Your Synology NAS.

*easy to follow may be relative to your exposure to config files, IP address mapping etc
Dawarich lets you import location history from Google Maps or you can have apps on your phone regularly tracking and reporting your location history directly to your Dawarich server.
Is Bing Maps really a Zombie?
Sticking on the theme of making mapping stuff worse, Microsoft has been busy “evolving” Bing Maps.
Launched as “Virtual Earth” over 20 years ago, it morphed into numerously named Windows Live, MSN and eventually Bing Maps for consumers as an alternative to Google Earth and Google Maps, and also aimed at enterprises in the hope that they would build mapping services into other applications and pay for the privilege. There had been a previous set of software and services called MapPoint dating back to the Y2K, now superseded.
There were some cool features that differentiated Bing from Google when it came to maps – things like high-resolution “Birds Eye” images taken from spotter ‘planes…


… to free use (for UK users) of the Government’s Ordnance Survey mapping data. At one point, Bing even licensed the old A-Z maps for London, as “London Street Maps”.


Bing also offered drive-by imagery akin to Google Street View called Streetside. It was never quite as good as Google’s service and it took years to become available internationally, but there were places where it would have more up-to-date pictures compared to Google’s own Street View pictures and data.
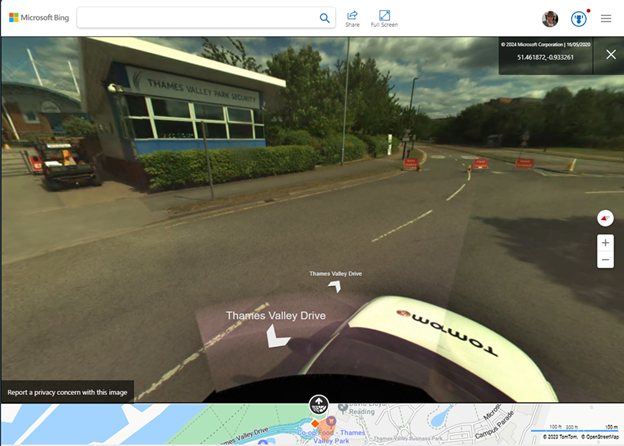

As you can see from the view above, the images were taken by cars operated by veteran satnav provider, TomTom. Similarly, the Ordnance Survey maps and Birds Eye images were licensed from other 3rd parties.
Unfortunately, when a licensing agreement exists then it also means at some point, one or both parties might decide to not continue it. Such has happened with Bing Maps, the consumer offering – it has dropped pretty much everything of interest beyond basic map and satellite views. A 3D option does offer some cartoonish generated models of some areas, though it’s a long way from being universal.


Microsoft also had a Maps app for Windows, which was a wrapper for the Bing Maps service but could also deal with offline data. Presumably due to lack of use, the Maps app has now been taken out behind the bike shed and given a good knobbling:


On the plus side, one useful feature which wasn’t present previously, the latest Bing Maps will show the exact address (including Post Code or Zip Code) of any point you right-click on, also displaying the lat/long coordinates and even the height above sea level.


It was announced that Microsoft is shutting down Bing Maps for Enterprise and migrating everything at the back end to using Azure Maps, which has a different set of functionality primarily aimed at developers looking at embedding maps into other sites and overlaying other data onto a map. It’s easy to wonder at what point Redmond will pull the plug from Bing Maps altogether.
Accessing Missing data from Bing
Sadly, there’s nowhere else providing the TomTom Streetside views, nor the Birds Eye images, other than going to Google Maps and seeing what they have.
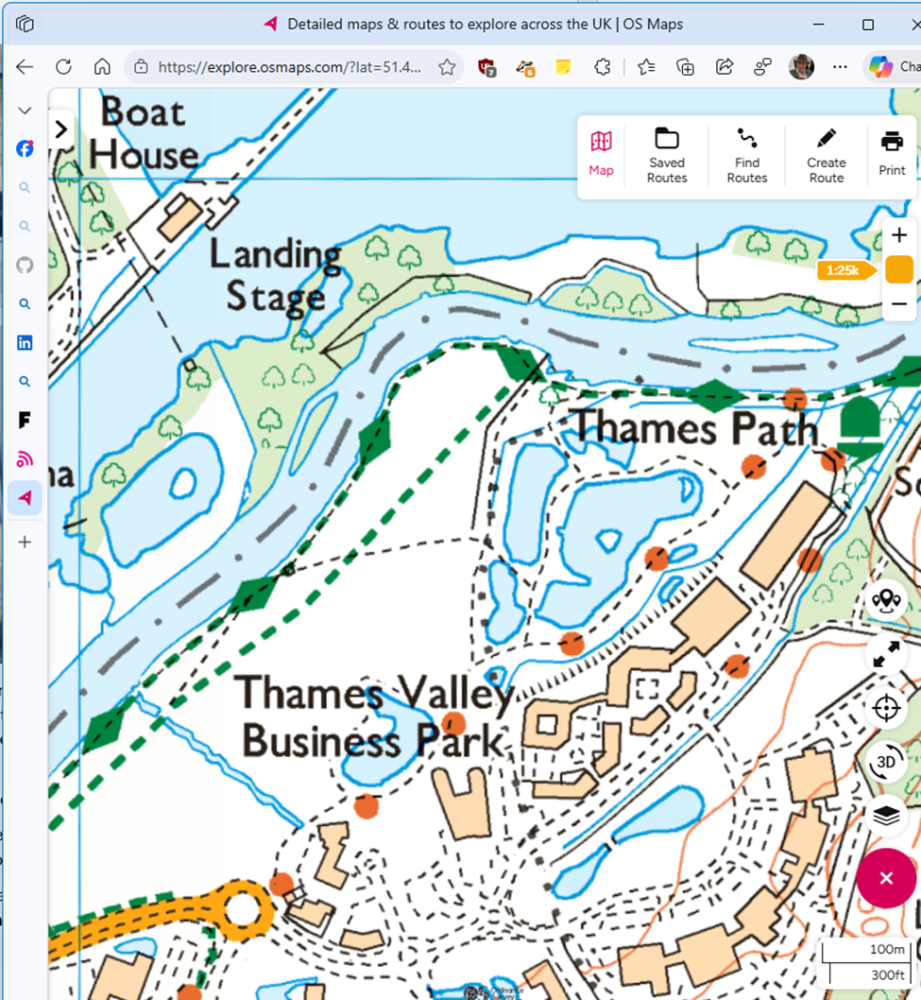
If you miss the OS Maps feature from Bing Maps, there are few alternatives – the best is probably OSMaps.com, which still offers (for a subscription) what they call topographical maps (i.e. OS LandRanger or Explorer). It’s a little clunky but has a reasonable mobile app too, so you can plan trips and take them offline with you.


