 Even after 2 years of mostly enforced remote meetings, it’s still amazing how many people have yet to master some of the basics of online meetings – like management of the mute button and general audio interference, positioning of screen/camera so you’re not looking up their nose or side of their face, professing to having bandwidth issues as the reason for not enabling video, and many more. One “room for improvement” function is that of presenting PowerPoint slides and not looking like an idiot. Even after 2 years of mostly enforced remote meetings, it’s still amazing how many people have yet to master some of the basics of online meetings – like management of the mute button and general audio interference, positioning of screen/camera so you’re not looking up their nose or side of their face, professing to having bandwidth issues as the reason for not enabling video, and many more. One “room for improvement” function is that of presenting PowerPoint slides and not looking like an idiot.
 Firstly, have a practice with Teams if you’re not sure how things are going to work out – just go to the Calendar tile and you’ll see a Meet now option in the top right; that creates a new instant meeting in which you can play. Firstly, have a practice with Teams if you’re not sure how things are going to work out – just go to the Calendar tile and you’ll see a Meet now option in the top right; that creates a new instant meeting in which you can play.
Don’t share your screen to present slides in Power Point (unless you really insist). Instead, save your PowerPoint to OneDrive for Business or SharePoint, and you’ll see a Present in Teams button in the top right, or a larger button on the Slide Show tab. Point (unless you really insist). Instead, save your PowerPoint to OneDrive for Business or SharePoint, and you’ll see a Present in Teams button in the top right, or a larger button on the Slide Show tab.
Choosing this opens up a Presenter View akin to the one in PowerPoint, which is the default if you have multiple monitors and you start a Slide Show. This view lets you see Speaker Notes, jump quickly to specific slides rather than paging through them, and be more interactive with the meeting than you could ever be if you were simply sharing a screen showing a PowerPoint slide on your computer.
 Perhaps the most useful aspect of this mode in Teams is that you can still show the Chat or People pane to the side of the window – allowing you to keep an eye on attendees who might have their hands raised, or who ask questions in the meeting chat. Perhaps the most useful aspect of this mode in Teams is that you can still show the Chat or People pane to the side of the window – allowing you to keep an eye on attendees who might have their hands raised, or who ask questions in the meeting chat.

 There are some other controls of note – the eye icon lets you decide if attendees can flick through your slides or whether you want to lock them to seeing only the slide you’re currently presenting. Useful if you have a Big Reveal coming at the end. There are some other controls of note – the eye icon lets you decide if attendees can flick through your slides or whether you want to lock them to seeing only the slide you’re currently presenting. Useful if you have a Big Reveal coming at the end.
Next to that icon, there are some others which define the presenter mode – Content Only on the left, shows just the slide you want. Next to that is Standout, which takes your video and overlays it onto the slide rather than having it appear as one of the surrounding gallery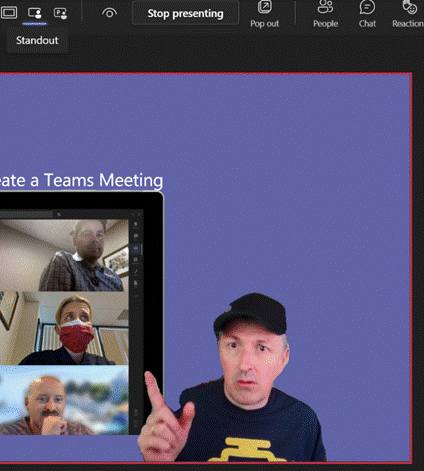 of other attendees. And next to that is a new preview PowerPoint feature called Cameo, which integrates with the Teams Client. of other attendees. And next to that is a new preview PowerPoint feature called Cameo, which integrates with the Teams Client.
A downside of the Standout mode is that you don’t get to control where your image goes on screen, or how big it is – so you might well obliterate some part of the content you’re presenting. This new feature gives you a way to solve that.
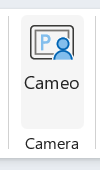
In PowerPoint, go to the Insert tab and on each slide add a Cameo (or a Camera as the object it creates is described in some controls), then place and size it as you want.
If you select the new object, the Camera tab will give you more customization options.
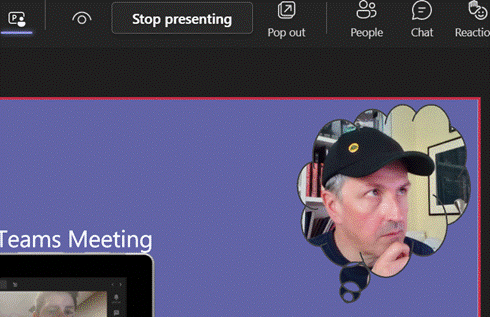 Use the Camera Styles gallery to pick from a shape and border/shadow combination, though the Camera Shape menu offers other variants to enhance your impact. Use the Camera Styles gallery to pick from a shape and border/shadow combination, though the Camera Shape menu offers other variants to enhance your impact.
You will need to add a Cameo to every slide you want to show up on – potentially useful if you want to only appear for intros and Q&A but perhaps leave the content on its own for other parts.
 Since each slide has its own Camera object, they can be of different shapes and you can even use the groovy Morph animation effect to transition too. Since each slide has its own Camera object, they can be of different shapes and you can even use the groovy Morph animation effect to transition too.
 While in Presenter view, try using a “laser pointer” to temporarily show traces around something on your slide, with mouse or Surface pen to control it. There is a pen or highlighter to make more durable Ink markups, and if you double-click/tap each icon, you can set options like size, colour, adding arrow tips etc. While in Presenter view, try using a “laser pointer” to temporarily show traces around something on your slide, with mouse or Surface pen to control it. There is a pen or highlighter to make more durable Ink markups, and if you double-click/tap each icon, you can set options like size, colour, adding arrow tips etc.
 One downside of the Presenter View is that it shrinks the content on your own screen to the point of possibly making it difficult to read, especially if you’re showing the People or Chat pane as well – in fact, the content is only about 20% of your screen real estate. One downside of the Presenter View is that it shrinks the content on your own screen to the point of possibly making it difficult to read, especially if you’re showing the People or Chat pane as well – in fact, the content is only about 20% of your screen real estate.
Using Pop Out might help if you have a larger second screen connected, though chances are you’ll be using the camera on a laptop so ideally want to be looking at that display.
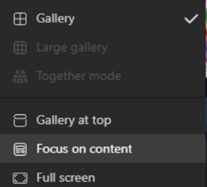
Since nobody really uses Speaker Notes anyway, you could try Hide presenter view, which means you’ll lose the slide thumbnails and speaker notes, but still keep the other controls. Go to the View control on the top left of the window and choose Full Screen to increase it even more.
For more details on using the new Cameo feature, see here – it is in preview which is rolling out through Office Insiders first so you may not see it right away. If you are presenting using simple app or desktop sharing rather than the PowerPoint Live model described above, there are some other options in how you appear alongside your content.
As well as launching the PowerPoint Live sharing from within PPT itself, you can choose to share recent presentations while in Teams – just scroll down past the various “share screen / app” options and you’ll see more. This topic was covered previously on ToW #576. |
 One of the most profound changes in the way most people use the internet has been broadening out to using a variety of devices. As well as having a selection of laptops, phones and tablets, people will surf across them all the time – from playing with a phone while watching TV, to reading an article or book on a larger-screen slate as well as working on a regular laptop or desktop. Browsers have added functionality to smooth the transition, but most people are probably unaware.
 You’ll typically be offered the chance to sign-in and sync your favourites, history and passwords across any other device that you’re using when running Edge or Chrome. If you’re browsing across multiple PCs, one way to easily pick up where you left off would be to go into the browser’s history and revisiting sites browsed from current or previous machine, or use Favourites/Bookmarks or Edge’s Collections.
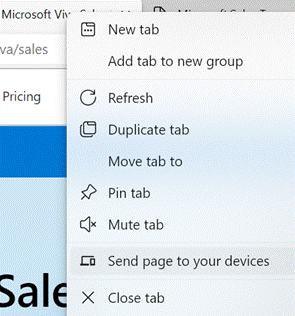 Edge gives you a simple way of sending a currently-viewed tab to another PC or a mobile device – right-click on the browser tab and choose from a list of other devices that you’re signed in on. You’ll then see a near-real-time notification on the other machine that the page has been shared with you.
 On phones and tablets, if you’re also using Edge and signed in, you’ll see a Send to Devices option on the browser menu, so you can fire links straight to your PC.
  If you don’t yet have enough toolbars in your life, you could look on the Edge Sidebar, at the new Drop feature, which lets you transfer snippets of text or whole files between browsers on multiple PCs or mobile devices.
 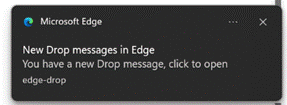 It might be the quickest-yet way to send a photo from a phone to your PC, where received files are dropped into the Downloads folder and stored in OneDrive for other devices to access.





![clip_image002[4] clip_image002[4]](https://tipoweek.azurewebsites.net/wp-content/uploads/2020/03/clip_image0024_thumb.png)
![clip_image004[4] clip_image004[4]](https://tipoweek.azurewebsites.net/wp-content/uploads/2020/03/clip_image0044_thumb.png)
![clip_image006[4] clip_image006[4]](https://tipoweek.azurewebsites.net/wp-content/uploads/2020/03/clip_image0064_thumb.png)
![clip_image008[4] clip_image008[4]](https://tipoweek.azurewebsites.net/wp-content/uploads/2020/03/clip_image0084_thumb.png)
![clip_image010[4] clip_image010[4]](https://tipoweek.azurewebsites.net/wp-content/uploads/2020/03/clip_image0104_thumb.png)
![clip_image012[4] clip_image012[4]](https://tipoweek.azurewebsites.net/wp-content/uploads/2020/03/clip_image0124_thumb.png)
![clip_image014[4] clip_image014[4]](https://tipoweek.azurewebsites.net/wp-content/uploads/2020/03/clip_image0144_thumb.png)
![clip_image016[4] clip_image016[4]](https://tipoweek.azurewebsites.net/wp-content/uploads/2020/03/clip_image0164_thumb.png)
![clip_image002[4] clip_image002[4]](https://tipoweek.azurewebsites.net/wp-content/uploads/2019/08/clip_image0024_thumb.png)
![clip_image004[4] clip_image004[4]](https://tipoweek.azurewebsites.net/wp-content/uploads/2019/08/clip_image0044_thumb.png)
![clip_image006[4] clip_image006[4]](https://tipoweek.azurewebsites.net/wp-content/uploads/2019/08/clip_image0064_thumb.png)
![clip_image010[4] clip_image010[4]](https://tipoweek.azurewebsites.net/wp-content/uploads/2019/08/clip_image0104_thumb.png)

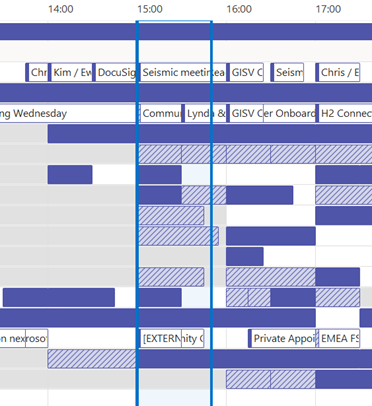
 info you’d see by default would be their free/busy status – which isn’t really much use if you’re trying to collaborate with them. All it would take is
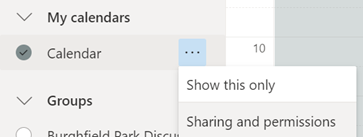
  are a few options for better calendar sharin: if you look on the Share tab when looking at the Calendar in Outlook 2013, you’ll see a
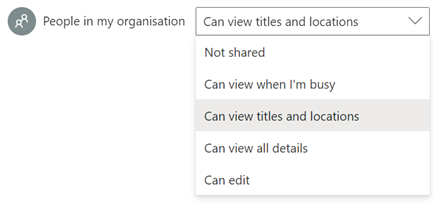
  Calendar Permissions option, which will let you set the default permissions on your calendar, and see/set it you’ve granted more rights to certain folk – so you could allow everyone to see basic info, and your closest colleagues can be given the right to see everything.
 given date and time (and a one-click link to make a booking).