665 – Mind your screenshots

imageScreen-grabbing has been around in some forms since the earliest days of the IBM PC – there is a PrtScn key on most keyboards, for example. Back in the day it would have sent the contents of the screen to a physical printer but later might save the info to a file or copy it to the clipboard.

Windows has had a screen grabbing utility for a while called Snipping Tool, which was replaced with a new tool called Snip & Sketch. The gist of these tools was that pressing some key combo (eg SHIFT+WindowsKey+S) would grab a portion of the screen and copy it into the clipboard. Snip & Sketch ultimately gave way to a new version, called, er, Snipping Tool. There have been many ways to take screen shots over time.

clip_image002clip_image004The latest iteration of the app throws a toolbar at the top of the screen when invoked with SHIFT+WIN+S, and gives a variety of options on how to grab that screenshot. You can also set Windows to use the physical PrtScn key to do the same in case you forget the shortcut combo.

After completing it, you’ll see a pop-up in the lower right to tell you that it has completed.

In previous versions, if you wanted to manipulate or save the screen grab, you’d need to click quickly on that toast to then launch the Snipping Tool UI with the grab inside, or else you’d need to paste the image that is now in the clipboard into another image manipulation tool and modify or save it to a file from there. Annoyingly, there’s never been an option to paste what’s in the clipboard into the Snipping Tool’s UI, so you could edit or save it quickly.

clip_image006An alternative approach would be to start the Snipping Tool first and initiate the screen-grab from within; you could make some simple tweaks and highlights (like cropping it, or circling a part of the screen in red ink) from there. Kicking off the snipping from within the tool gives you other options too – like grabbing in a few seconds, to give you time to ready the app you’re trying to capture.

clip_image008A new feature to the Snipping Tool is the default setting that it saves snips to a “Screenshots” folder; it’s configured in the Tool itself, should you want to disable it.

The Screenshots folder itself is within your “Pictures” folder, unless you’ve decided to move it somewhere else (if you’re that way inclined, open the Pictures folder, right-click on Screenshots and under the Location tab, click Move to find a new home for it).

clip_image010It’s worth keeping an occasional eye on the size of the Screenshots folder, as it could well have hundreds of grabs totalling many megabytes of data. Screen grab files are named with the date and time in the filename,  so you can easily get to the latest one by opening the folder and pressing the Home or End key (depending on how you have it sorted). Feel free to delete any you don’t need.

clip_image012The … menu in the top right of the Snipping Tool lets you quickly find your way to the Screenshots folder directly, or if you press WindowsKey+R and enter shell:screenshots, it’ll open in a new Explorer window.

If you favour command lines in general, you can also start the Snipping Tool by pressing Win+R and entering ms-screensketch: (including the comma) to run the full UI or ms-screenclip: to jump straight to the capture just as if you’d pressed SHIFT+Win+S.

552 – snip snip, cap cap

clip_image002
One of the more popular Windows utilities, especially amongst people who need to share instructions on how to use other software, was the Snipping Tool. It lets you capture all or part of the screen, which means if you want to paste just a section of a screen dialog or menu into a doc or email, it’s very useful. For anyone writing user documentation, or even sending weekly emails to thousands of people for years and years, it’s a handy tool.

clip_image004It was announced a couple of years ago that the old Snipping Tool that was part of Windows was to be clip_image006retired – in fact, it’s still there (following lots of user feedback, akin to the Save the Blibbet campaign) but its successor – the Snip & Sketch app – offers more functionality and is included with current versions of Windows 10. Invoking it with the WindowsKey+SHIFT+S is the quickest and simplest way to grab some or all of the screen, and if necessary, draw or annotate on it, save it as an image file and so on.

clip_image008There are other screen capturing tools, of course – OneNote had a precursor feature which could be used to do much the same as Snip & Sketch, and even used the same shortcut key. OneNote makes such a great destination for screen grabs that the Clipping option is still there in the trad. version, and of course both variants can be the destination for something that’s been grabbed to the clipboard using Snip & Sketch.

There’s also theclip_image010 super-handy OneNote Web Clipper browser extension, which lets you grab web pages to add to your notebook with a couple of clicks.

clip_image012Now the Edge browser is going to add some web capture capabilities natively – currently in testing and rolling out to a subset of Insiders, there will be a new menu option to grab a section of a page, including the ability to scroll down the page while capturing (rather than just grabbing what’s on the screen).

Eventually, the new Edge will adopt some of the functionality that legacy Edge had when it comes to annotating web pages with ink, adding notes to pages etc – but the forthcoming web capture is a first step. Note – if you use Mouse Without Borders, it already has the CTRL+SHIFT+S keyboard combo in use, so you’ll need to change that…

Tip o’ the Week 449 – Snipping Tool gets the snip

As mentioned in ToW #447, there are some tweaks coming in the Windows 10 October 2018 update, which might be with us sooner than you think.The old Snipping Tool (not to be confused with the similar screen snipping utility that’s installed if you have OneNote 2016, activated by pressing WindowsKey+S) is going away, and giving way to a new program. And some people aren’t happy about it (in fact, if this was a story which features on the sponsored clickbait tiles on the Edge browser homepage, it’d be described as Microsoft Has a New Trick, and These People are Furious About It…).

The new Snip & Sketch tool (which is a Modern App, and that in itself means Some People Are Mad at What Microsoft Just Did…) also replaces the previous OneNote method (by using WindowsKey+S), launching a simple toolbar at the top of a greyed-out screen, making it quick and easy to either grab a rectangular portion of the screen, a free-form selection, or the whole screen itself.

If grabbing a free-form selection, once you’ve more-or-less completely made a shape and when you release the mouse button 
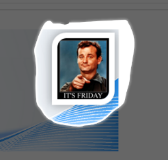
you’ve been holding down, then a large “toast” appears in the bottom right of the screen advising that it’s now in the clipboard. If you click on that, 
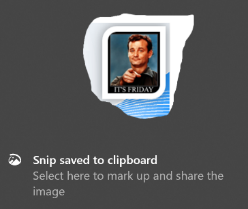
you’ll be launched into the Snip & Sketch app, where you can do various tweaks to your grab, save it, share it and so on. An alternative to the Win+S method of invocation is to go into Snip & Sketch to start with, and initiate a new screen grab from there.

Despite the fact it’s a Modern App and People With Too Much Time On Their Hand Think This… is a bad thing, it’s actually pretty snappy and provides a useful polish to one of the more esoteric but handy features in Windows.

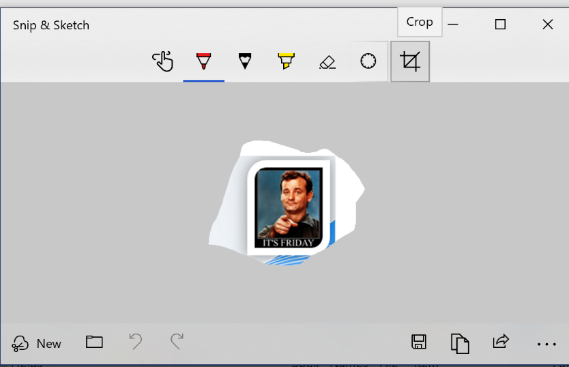
Handy especially if you prepare any kind of training documentation, or you’re stupid enough to send out a weekly tips email to thousands of people for 9 years.

Of course, another method (useful in the preparation of this very note) is to rely on the old PrntScn button, the pressing of which dumps the contents of the screen – floating toolbars and everything – straight into the clipboard.

Paste the contents into MSPAINT, then use the Snipping method above to grab the relevant section of your screen grab, and you’re sorted.

Tip o’ the Week 390 – Paint it black

SHOCK, HORROR!”, the internet & news media said, “Microsoft is killing Paint!”. Cue the opportunityclip_image002 to make Clippy comparisons, and reflect on a bit of software that appeared in its first version in Windows 1.0, bring out the odd eccentric who manages to produce quite amazing art using Paint (like Pat Hines, who’s tried other paint software but “never managed to ‘connect’ with it”, or Jim’ll Paint It, who paints odd scenes on request, and whose fondness for MSPaint means he prefers the WinXP version).

Most of us probably don’t use MSPaint for much these days; maybe the odd bit of clumsy touching-up of images, or using it to snip bits out of screen grabs for documentation purposes.

Here’s one use case, if you’re in the UK and want to print out a map for a walk you’re going to do – fire up MSPAINT, set the clip_image004canvas dimensions to something huge like 4096×4096 (in File / Properties), then go to Bing Maps and screen grab (WindowsKey+S, or use the Snipping Tool) the relevant sections of your planned walking route, looking at the Ordnance Survey view in the top right, and zooming in so you see the footpath details.

For longish walks, you’ll struggle to fit the whole route on one screen at the max detail level, so you’ll need to grab a bit, paste it onto the Paint canvas, move the map view, grab the next section, then using Paint, assemble the bits together like overlaying jigsaw pieces by moving your newest-pasted chunk around so it fits the rest. Copy the whole finished lot into a Word doc, and print.

Anyway, Paint is most definitely not dead – it’s just going to be an app that’s packaged and maybe delivered via the Windows Store, just like lots of other apps that are traditionally part of Windows and may or may not be installed by default (like Calc, Mail, Groove etc). There’s always Paint3D, too (ToW 358).

If you do need to do some more intensive image manipulation, especially of photos, there are many free options, from Adobe’s PhotoShop Express or the built-in Microsoft Photos app, which lets you carry out simple tweaks to photos you’ve acquired. For more creating and pixel-by-pixel tweaking of images, though, you’d be hard pressed to find a better value yet powerful tool than Paint.NET. It looks a bit 1990s in some respects, but it’s a simple and effective image editing tool, that has been likened to the bits of Photoshop that people like, simplified and delivered for free.

Find out more about Paint.NET here – download directly from here, and keep an eye out for a packaged version of Paint.NET hitting the Windows Store at some point, too. Who knows – maybe it will be there before MSPaint is loaded on the cart and taken away?