 ToW has covered various strategies in dealing with email (189, 223, 310 and more), but this week’s tip is shamelessly lifted from a LinkedIn article by an erstwhile colleague and media industry leviathan, Tony Henderson. ToW has covered various strategies in dealing with email (189, 223, 310 and more), but this week’s tip is shamelessly lifted from a LinkedIn article by an erstwhile colleague and media industry leviathan, Tony Henderson.
Tony, it turns out, authored a book a few years back which offered a slightly different-than-the-norm spin on productivity and how to deal with some of the difficulties of the modern workplace. It’s from this tome that he picked some great tips in handling your inbox – perhaps leading to the ability to clear it completely and leave “inbox zero”. The Eleven Rules of Email
See Tony’s article here, and The Leopard in the Pinstripe Suit, here. |
Tag: Productivity
Tip o’ the Week 356 – How not to send mail accidentally
 An ohnosecond is the small measure of time between a luser doing something seemingly innocuous, then realising the true magnitude of what you’ve done.
Frobbing a scram switch without knowing. The dawning reality that a protest vote might actually result in that thing actually happening. Sending an email to someone you didn’t mean to, that kind of thing.
Fortunately, most of us have a limited ability to truly mess things up (leaving aside Darwin Awards candidates), but something that most of us will have done at some point, is that unintended sending of mail. The situation could come up for a number of reasons:
- Someone is copied on the mail that you’re replying to, and you either don’t realise or you intended to remove them from the list but forgot. Maybe you went on to theorise about their capability or speculate on their intent. Normally just embarrassing, could be career-limiting.
 You accidentally add someone to the TO: or CC: line of a mail, intending to remove them, but don’t. This is basic carelessness which can be avoided by not adding people to the TO: or CC: lines of your email unless you genuinely intend to send the mail to them… [coming to a Bedlam expansion pack sometime]
- You Reply-All by default to emails, maybe asking to be removed from the mailing list. Don’t do that. Seriously.
- You send an email then just after, realise that a later message has changed the conversation and that, if you’d read that first, you either wouldn’t have replied, or if you did, you’d say something different.
There are a couple of easy things anyone can do to avoid these issues, apart from thinking before sending and maybe re-reading all of what you’ve written before sending it to what you know to be a large group, or with important people on the list.

- DON’T put people on the TO: or CC: line as a way of looking them up in the address book; it’s an easy trap to fall into; maybe you just want to check how someone’s name is spelled, or find out who their boss is, etc. If you want to do that, go to the main Outlook window (ie not the email editor, if you happen to have that as a separate window), and just press CTRL+SHIFT+B to bring the address book to the fore. Or, click the Address Book button on the Home tab, or just type the name into the box above it.
- Try delaying the sending of new messages – in principle, keeping outbound mail in the special “Outbox” folder on your PC until some period of time before actually pushing the message out to the recipients.
 One option might be to delay specific messages, probably more for impact – if you want people to receive mail at a particular time (following an announcement that you know is going to happen at a set time, for example), then you can force that message to sit for a while – an extended time, maybe – before being put into the sending queue. See the Delay Delivery icon on the Options tab within the message window.
One downside to putting stuff in the Outbox is that when you’re running Outlook in the default “Cached” mode, then the Outbox is a special folder on your PC – so if something is sitting there waiting to be sent, and you put the PC to sleep or it goes offline, then the message will stay there until the next opportunity presents itself when your PC wakes up and is online.
There is a slightly more convoluted way of putting delayed mail in the Outbox on the server – see veteran ToW #30. To delay every message for just a few minutes, to give you an opportunity to yank them from the Outbox, then create a rule…
 - On the Home tab in main Outlook window, try creating a new rule by going to Manage Rules & Alerts then, and
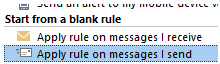
 choosing New Rule, then under “Start from a blank rule” choose “Apply rule on messages I send”
 - On the new rule dialog, select “Next” to apply the rule to every message sent (on the “Which condition(s) do you want to check” tab), then on the “what do you want to do with this message” page, select the “Defer delivery” option and choose the number of minutes, then hit Finish / OK to apply the rule and return.


Now, when you send a message, it has the property set that delays it for however many minutes you wanted to wait – if you need to send it quickly (so you can disconnect or shut down, for example) you can go into the Outbox folder, open the message, change the “Delay Delivery” option on that individual message and press Send again.
Tip o’ the Week #324 – Delve into something new
|
If you can get access to Delve (either on https://delve.office.com or via https://portal.office.com, depending on your account and level of access), then it’s well worth playing with it for a while, especially if you work in a large company like Microsoft, where all sorts of interesting stuff is being saved onto shared document folders. One downside of Delve might be that nervous Nellies will stop putting their documents into shared areas in the fear that other people will read them, or that the default-to-open (for their internal staff) culture that typically pervades lots of companies will flip to an access-only-on-a-need-to-know-bassist. Delve lets you see what documents are popular, what people you are connected with are doing, and lets you search by document content or by author. Want to see what FY17 holds for your org? Wondering what juicy PPTs your VP has been editing lately…?
Announced recently, the Delve Analytics function (available to O365 users based on their license type), shows you not just what other people are doing, but how you are performing too. The Delve Analytics dashboard and corresponding Outlook Addin lets you see how you’re spending your time, and who you’re spending it with, promising to help you make the most of it.
The Outlook addin surfaces Delve info within Outlook’s reading pane, so as long as you’re looking at colleagues who’re in the same Office 365 environment (which might be an issue in MSIT, where there are several tenants), you’ll see stats about how often and effectively you email with each other. Here’s one example; judge not any of the numbers…
Eek. 3h 31m average response time. Must try harder to do less email and do more work. |

 Have a Delve…

Tip o’ the Week 317 – The Wunder Years
|
Which serves nothing more than a neat segue to this week’s topic – the wonderful Wunderlist. After being acquired by Microsoft in mid-2015, the Wunderlist product is still looking refreshingly independent and has a engendered a particular love from its avid users. And it’s available on lots of platforms too. And it’s basically free.
Now, most of what you can do with Wunderlist could also be done with Outlook (either natively or through addins from other providers) but aficionados will wax on about how much slicker or easier Wunderlist is. As usual with these things, it’s all about putting the theories you already know into practice, and seeing how the tools suit your own way of working. Things Wunderlist is great at:
And now, there’s even an Outlook addin for Wunderlist, most commonly available through Office365 or Outlook.com. The addin can be used either in Outlook online in a browser, or in the desktop client, and adds a Wunderlist menu to the home tab, so you can very quickly create list items from within email. It’s really easy to set reminders too – possibly even quicker than flagging an item in Outlook and setting a time to remind you by; with the added benefit that Wunderlist reminders show up in Action Center and you’ll also get an email when the action is due, so if you’re a habitual inbox junkie who finds it hard to use a separate task list, then somewhat perversely, Wunderlist might actually help you take your eyes out of the in-tray and remember to look at other things along the way. Check out the Office Store for your Wunderlist addin or see more detail on here.
|


Tip o’ the Week 314 – time, time, time, see what’s become of me
 In the northern hemisphere, it’s winter. Time marches slowly by, as the springtime stretches just out of reach ahead of us, leaving many of us trapped in artificially-lit offices, commuting in the cold, wet & dark, feeling generally starved of all natural stimulus and connection with the outside. Oh for heaven’s sake, cheer up.
From telling the time to trying to stop wasting it, horology has featured in Tips o’ the Week passim. Microsoft employees can benefit from a 5-year old yet most excellent tool called FocusTime, which will silence interruptions when working in blocks of predetermined length – following something called the Pomodoro technique. The beauty of this internal-only app is that it switches Outlook to offline mode and Skype for Business to Do Not Disturb, while you’re supposed to be focussing – something the Outlook team should build in, fer sure.
There are other Pomodoro apps too, for Android, iOS, Windows Phone and Windows 8/10.

If you want to know how you’re spending your time, however, here’s a cool fremium app/service call RescueTime. It installs an agent on your PC which acts like a proxy to any outbound traffic, and monitors what you’re doing – so it can report on the time you spend in different applications, what websites you’re visiting etc.
There are all sorts of controls over what it does and when, and you can choose to take the free version (which gives some basic functionality, reporting back what you’re doing) or pay $9/month for the premium one (or $72/yr), adding some more controls to stop you frittering away your time – what value is $6/month for improved productivity, even if 5* positive reviewers reckon it’s pricey?

The premium version can automatically sound an alarm when you’ve exceeded a certain amount of what you decide unproductive time (on the basis that, if you’re a social media  consultant, noodling about in Facebook and Twitter might be actual work, whereas if you’re an accountant, it’s probably not).
You can even get the software to block certain websites during particular times of the day, in case temptation gets the better of you, or give you some leeway to waste time but jump in when the limit has expired.
Might be worth checking out the freebie version first if you’re unsure, thought the premium one does come with a 14-day free trial too.
Tip o’ the Week #282 – Delay your mail

There are several techniques to delay sending messages, something that could be considered good practice – according to Harvard Business Review, for example, bosses who send email late in the night are causing lots of stress as people feel obliged to respond immediately. A counter-argument would be that if people don’t want to respond to emails late at night, one tactic might be to not be reading them late at night in the first instance.
There may be good reasons to be emailing late on, although sometimes the sender might appreciate a delay or a sanity check – like the Google Mail Goggles idea unveiled some years ago, that would check that the sender isn’t steaming drunk when sending mail late at night. Expect the Google Beer Scooter to be along any time soon.
Sometimes, it’s easy to spot that your boss is travelling – if you suddenly get an email dump, then maybe s/he has been offline in the air or on a train, and has used the time to catch up on stuff which only gets sent when they arrive and connect. This is, of course, a good use of time that would otherwise be spent looking out of the window, watching movies on the seat-back screen and/or getting tanked up on inflight vino.
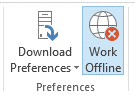 Back on terra firma, if you do need to write emails that may not need to be sent or read over a weekend or during the night, you could try Offline mode: simply go into the Send/Receive tab of the main Outlook window, and click the icon in Preferences.
Outlook being in Offline mode lets you review the emails you’ve got sitting in the Outbox, before committing to ![]() sending them, which could be handy especially if you’re bulk-sending. Alternatively, when in online mode, you, you can delay individual emails’ sending time by looking in the Options | Delay Delivery section of the actual message window.
sending them, which could be handy especially if you’re bulk-sending. Alternatively, when in online mode, you, you can delay individual emails’ sending time by looking in the Options | Delay Delivery section of the actual message window.
Delay everything
Another safety valve that some people rely on is to slightly delay everything they send – a technique that lets you fish out messages from the Outbox folder in case of accidentally sending them to the wrong person, hitting send too soon, etc.
The trick is to create a rule in your mailbox (NB – if you want to follow these instructions, you may want to arrange your windows so that you can see this on a 2nd monitor, or arrange the main Outlook window and this message side-by-side, as when you start digging around in Outlook rules, you won’t be able to flick back to this message if it’s behind the Outlook window).
- In the main Outlook application window, go to Manage Rules & Alerts and click on New Rule
- Select Apply rule on messages I send and then determine if you want to apply some other conditions – maybe you only want to delay emails being sent to certain groups of people or if they contain certain words; if you don’t want to restrict to a given set of conditions, just leave everything blank and hit Next – and accept the fire-and-brimstone warning
 message that this rule will apply to every message…
 - Next, set the timing you want to apply to the rule and hit OK – and when you go to save/apply the rules, you’ll get a warning that this rule will only run on this PC, which is as expected, since it’s a client-side one.
- Now, be careful – outgoing messages will sit in the Outbox folder on the PC you’re using, but that’s a special folder that exists only on your current machine and isn’t
 synchronised with the server or anything else – so if you hit send and then immediately close the lid on your laptop, your PC might go to sleep and the email will stay in Outbox until it resumes again…
 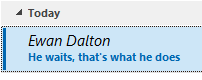 If you get cold feet on sending, or decide you need to edit your missive, just go into the Outbox folder, and if the email shows with the recipient name or address in italics, then it means it’s waiting to be sent – if you open up the mail and then just save it again, it’ll stay in the Outbox but won’t be sent until you edit it again and press the Send button again.
Finally, it’s possible to send mail in the future/from the past when you’re offline entirely. That’s a whole other topic that’s been covered 4 years ago.
Tip o’ the Week #260 – Scan cards to OneNote

Business cards are still a big part of business culture – even if many of us primarily communicate via email, the ceremony of handing over a little card with your name on it, at the start of a face-to-face meeting, is still quite important. Some countries, such as Japan, have very particular etiquette rules surrounding business cards, so it could take a long time for them to become obsolete.
What better time to institute a resolution to digitise the pile of business cards you may have lying on your desk, than the new year? And to routinely add new business cards to your Outlook contacts folder when you get them, without waiting ages? Well, an update to the amazing Windows Phone app, Office Lens, can help out.

![]() The Lens app (install from here) now has an ability to scan business cards as well as photos, whiteboards & documents. Just tap the option on the top right of the app to choose the mode, then select business card. Now, point the phone at the business card you want to scan in, tap the screen to focus and press the on-screen camera icon or the phone’s camera button, to “scan” the card.
The Lens app (install from here) now has an ability to scan business cards as well as photos, whiteboards & documents. Just tap the option on the top right of the app to choose the mode, then select business card. Now, point the phone at the business card you want to scan in, tap the screen to focus and press the on-screen camera icon or the phone’s camera button, to “scan” the card.
It helps if there’s a contrast between the card and the surface it’s on, so if you have a light desk then try getting a piece of coloured paper, and you don’t necessarily have to angle straight down – try to avoid casting a shadow over the card. The software will try to identify the edges of the card and will scale it as if it was flat, and fills the image.
 Once you’ve photographed the card, you can choose if you want to select & use it, delete it and try again, or possibly add another image – so if your card has info on both sides or you want to batch people from the same company up in one go, then you can have multiple images per contact page.
After tapping the save icon, you can choose which section in OneNote you want to save the resulting info – it may be worth setting up a new section in your notebook on OneDrive, just to catch all the contacts while you decide what to do with them. It works best if you have a pile of cards to just scan them all in as one production line, then go through them and edit/tidy up as appropriate.
Each card will produce a single page in OneNote, with the image(s) of the card embedded, and OneNote will try to identify the text off the card and also figure out the key fields (such as name, address, telephone, email etc). The title of each page might not be all that helpful (by default, it’ll be something like “05/01/2015 13:01 Office Lens”) , but it will be possible to search across the whole notebook, so you can find the contact details from each scanned card without necessarily having to do any more. You can always rename the OneNote page later, if you like.
If you want to add the resultant scan to Outlook’s contacts, then each OneNote page that can successfully identify enough key information from the scan will show a “BizCard” attachment, which opens a vCard of the contact information. Simply open, make any final tweaks, hit Save and it’ll be added to your Outlook contacts folder.
Finally, you’ll probably want to delete all the scanned images from your phone – they’ll be cluttering up your SkyDrive/OneDrive Camera Roll folder if you have automatic upload still enabled, so the quickest way would be to use your PC to delete all the card scans from that folder and let it sync back to OneDrive.
Tip o’ the Week #259 – Manage your Christmas Cards in Outlook
Happy New Year! For many of us, time to chuck out trees, and pack away any and all decorations, never to be seen again until December ‘15. Before you recycle the cards you may have received over the holiday season, here’s a quick way of using Outlook to make the job of sending your cards that bit easier.
It involves creating a new view and a couple of custom fields within the Contacts function in Outlook – as has been mentioned before on ToW, when Outlook views any item (an appointment, a contact, a task etc), all it’s doing is using a particular form to display a bunch of fields. It’s possible to easily extend those items with your own fields and there are form editing capabilities too, but we’re not going to use them today. This tip might look a bit daunting but it’s really quite simple, and it’s something you’ll only have to do once – it persists in your Contacts folder so is available on all PCs.
If you have multiple monitors, then it might help to put this email on the 2nd monitor as you may not be able to easily switch to read the instructions whilst you’re setting things up. Or maybe just print it out.
 Create a new view
Firstly, go into the Contacts folder then select the Views tab, and select Change View, then Manage Views to see a list of views that apply to your Contacts folders. Click the New… on the top right.
Select Table as the type of view and give it a name like Christmas Cards, then click on OK to create and start editing the new view.
Click the Columns button and remove everything from the “Show these columns” list on the right hand side, except for Full Name.
Now, it’s time to create a couple of new columns which will be visible in the view and can be used to  track interesting bits of info – like whether you sent a card to this contact, and if you got one in return. Click on the New Column button and for the name enter Got Card, then choose Type Yes/No and leave Format as Icon. Press OK to create, and repeat the process for the Sent Card field.
Now, select other relevant fields from the chooser on the left – try selecting  All Contact fields from the “select available columns…” drop-down box, then pick some of the more esoteric contact fields that already exist – Spouse/Partner and Children fields will let you remember who to make the cards out to, and Home Address and Notes are pretty self-explanatory.
Once you’ve created the view, resize the columns as appropriate (elongating address, for example). Now, you’re probably looking at a contacts list that’s got 1,000 entries of people you principally do business with, and a handful of friends you might send cards to. The next trick is to filter out people you want to be in the list.

The nice thing about using the Table type view is that you can edit in-line, ie. you don’t need to open up the contacts forms to change the details. Since you’ve just created the Got… and Sent… fields, none of your existing contacts will have a value for any of these fields.
If you click on the Got or Sent fields, you’ll set it to be either yes or no. Try locating a few of your friends in the list and tick these fields, maybe fill in Spouse and Children while you’re at it (and now’s a good time to do that, as you’ll probably have all their names on the cards you received).
 OK, now we have a quorum of contacts tagged with Got & Sent attributes, go into View Settings and click the Filter button, then switch to the Advanced pane. From
  the Field drop-down box, choose User-defined fields in folder and add Got Card.
Change the condition to exists and press Add to List.
Repeat the same process with the Sent Card field, then press OK. Finally, before saving the view, you might  want to change the Sort order to Full Name.
Now if you press OK to save the view, you should see your contacts list filtered to show you only the entries that you have tagged as having some value for both Got Card and Sent Card.
 If you want to continue adding contacts to the list, simply open your existing contact (maybe from the main Outlook contacts view), then click on All Fields, and select the fields from the user-defined fields in folder – you can then set Yes or No for each of the custom fields, and that contact will now show up in your Christmas Cards view.

If you want to ditch someone from the list, open their contact, look under All Fields, select from user-defined fields in this item (not user-defined fields in this folder!), select the field and Delete it.
 So what’s the point of all this faffing about? Well, in 11 months’ time when you come to do your next round of cards, just select the view in Outlook and if you select File / Print and select Table Style, you’ll get a nice sheet or two of all the details and addresses you’ll need to write all your cards.
Tip o’ the Week #251 – Toasting a new email message

You got a new email – hurray! Back in the early days of using email, it was expected practice for your email program to play you a little fanfare, pop up a message box to tell you that you’ve got mail, put an envelope in your system tray etc.
In the last decade, nobody in most companies needed to know they got a new mail. We all get far too much of it, and yet most email programs notify you by default. Stop that, it’s silly.
The inspirational Prof Randy Pausch advised switching this off: he delivered a great talk on Time Management, and watching it is a better way of spending 90 minutes than pretty much any other productivity-enhancing measure. Children of the 1970s and 80s in the UK will remember Why Don’t You?, with its somewhat perverse advice to “switch off your television set”.
Well, stop reading this email now and go and watch Randy’s Time Management video (same link as above you click junkies).
Still here? If you’ve never heard of Randy, he was diagnosed with pancreatic cancer in 2006 and sadly succumbed less than 2 years later. In the interim, he delivered “The Last Lecture”, an awesome (and we’re not talking Microsoftie, “hey, that was super-awesome!” kind of awesome, more the laughing-out-loud, tears-welling-up and rapt-attention kind) lecture on achieving his childhood dreams. Make time to watch The Last Lecture video if there’s only one video you watch this weekend.
 Anyway, this tip reprises the topic of the very first tip of the week – but this time instead of switching off a pop-up in Outlook, it’s about disabling the “toast” that appears in the top right of the Windows 8 screen to tell you that you’ve got new mail.
In Outlook 2013, go into File | Options | Mail and look under the Message arrival section then un-check the Display a Desktop Alert option.

It’s possible to disable all “toast” notifications in Windows 8, but that’s something of a lumphammer to crack a pine nut. If you want to do it, see here… otherwise, it’s best to control things within individual applications. Within the same menu, you can selectively toggle each app’s notifications setting.
If you’ve configured the Windows 8.1 Mail app to connect to your company email, then you might have the weird experience of seeing an incoming toast from both Outlook (represented as the upper one in the screenshot above, with the fizzog of the sender as represented in the GAL) and within the Win8 Mail app, shown by the different toast below (and possibly a different picture, depending on how the sender is represented in your contacts).
 To disable the toast from the Mail app, go into the app itseld and bring up the Charms (press WindowsKey+C or swipe from the right if you have a touchscreen, or put your mouse in the top right of the screen). Now select the Settings charm, then Accounts, then go into the account you have set up to your corporate emai (since you can set notifications differently per-account).

The “Show email notifications” dropdown allows you to select that you want to allow all email to notify you (bad) or perhaps only to show you mail from your Favourites, as defined in the People app.
Or, of course, to switch off altogether.
Tip o’ the Week #246 – The least-used key on your keyboard
 The computer keyboard will probably be with us for many years to come – it’s just such an efficient way (once you get used to it) of text entry, that it’s hard to imagine it’ll be replaced entirely with gestures or by speech.
There are some pretty obscure keys on the standard PC keyboard though – many of which date to the very earliest implementations of the IBM PC. What does Scroll Lock do, for example, other than annoy Excel users who think they’re moving the cursor around inside the sheet, only to find the whole thing is scrolling up and down?

The Pause key (often doubled up with Break, which dates back to the days of the telegraph) has one interesting modern side effect – press WindowsKey + Pause, and your machine will jump straight to the “System Properties” page – a handy way of checking the config of a machine you’re using.
These kinds of tips were once redolent of the doyen of desk-side PC support, where every second spared in visiting a user was time better spent in the pub. All of this is of course lost now, what with the risk in desktop sharing via Lync or Remote Desktop software.
The AltGr key normally found to the right of the space bar has a few odd functions that are not often needed, from a way of setting formatting in Office to a means of entering accented characters. Try AltGr+e for example to chuck an é into a name, and keep people with extravagant names happy that you’ve bothered to spell them correctly. There are other ways of doing the same thing, too – Office apps all have a means of using “dead keys”, eg CTRL+ ‘ followed by an appropriate letter would render an acute accent, or the CTRL+ ` (generally found on the key below Escape) will render the next letter with a grave. CTRL + Caret (^), Colon (:) or Tilde (~) will accent the following letter with the appropriate accent. See here for more international Office fun.
Finally, there’s the strange “menu” key, sometimes referred to a “application” or “right click” – usually found to the right of AltGr. It’s generally used as the equivalent of right-clicking a  mouse, though can be followed up with other keys to quickly perform functions that might otherwise need a few clicks or menu commands.

One example – if you are looking to paste some text in a document or email, you can quickly press the menu button then follow with T if you only want to paste the text only (ie plain text, not the formatting) or M if you want to merge formatting.
In a Metro Modern application, the menu/application/right-click key also has the same effect as swiping up from the bottom of the screen (or pressing WindowsKey + Z).