#38: Get ahead: get a proper monitor

clip_image002

As WFH became normalised during the pandemic, a lot of people went from having access to a reasonable working environment in an office, to sitting on the sofa or camping on a kitchen table. A trend of working from a laptop in coffee shops had already been underway and got additional legitimacy when things opened up again.

For the lucky ones with space at home, the increasing trend for WF there sometimes means they have a better environment than in the office – no desk sharing, putting up with co-workers’ smelly/noisy/annoying habits, perhaps even a faster internet connection. This doubtless contributes to the reported reluctance to return to the rat-race in the office.

Make the most of your screen

One huge downside of working off a laptop is that the screen – even for the biggest ones – is small.

There’s little doubt that productivity gains can be had by having larger monitors or more of them. Carnegie Mellon Professor Randy Pausch from gave a seminal talk on time management in 2007 – prescient, since he was dying of pancreatic cancer at the time and had only months left to live (his Last Lecture is also worth watching). In that session, he advised that maximizing screen real estate is one of the best things you can do.

The simplest way to improve screen area for a home office desk is to buy a decent monitor. Find one with adjustable height (so you can be looking straight at it, not down at a laptop screen) and position the laptop in front of you, below the monitor.

clip_image004

Extend the desktop to the big screen and make that your main display (so new windows, the task bar, Start menu etc will appear there rather than on your laptop).

clip_image006

Side-to-side

It’d be even better if you can use a proper keyboard and mouse, maybe with a suitable docking station, then park the laptop to the side. Ideally you should prop it up so that its display and your monitor are similar in height – there are plenty laptops stands available, or you could even just put it on a pile of books…

clip_image008

Big screen x little screens

If you’ve had a home office setup for a while, it’s possible you’ll have one or two old monitors that won’t be worth much at resale so you could always bring them into action in a true “multi-monitor” setup (without delving into additional hardware to allow more, Windows 11 supports up to 6 displays).

clip_image010

Then again, a single large monitor might be a bit more feng shui, and there are plenty of good displays out there. A single, widescreen, curved monitor could give you the same kind of functionality as having two side-by regular widescreen ones, with less cabling and fuss.

Modern displays often have USB hubs and lots of other features such as display modes where two inputs are shown side-by-side (so you have two different PCs on display, or a PC on one side and an Xbox on the other half, or take two inputs from one PC into one physical screen – the computer would see it as two side-by-side monitors, which might have benefits when it comes to app layouts).

Managing the placement of windows is a lot easier with the groovy window snapping stuff introduced in Windows 11 (hover over the maximize icon on the top right of your window, and you’ll see options for where to snap it onto the screen… it’s more than just left/right since if you have a mahoosive screen, you’ll likely have several windows side-by-side). If you need more control, or you’re running Windows 10, try the Fancy Zones utility as part of PowerToys.

clip_image012

Dell Ultrasharp and Display Manager

Dell have long made some of the best PC monitors; particularly their more expensive Ultrasharp range. If you’re shopping for a new screen, there are various ways to save money too – they have a Dell Advantage program where you can get specific vouchers (eg Microsoft employees can get theirs by entering their work email here), and they have an Outlet store for refurbished goods.

clip_image014

If you have a Dell monitor already, there’s an app for Windows and Mac which could make your life a little better, especially if you routinely switch between inputs / PiP modes etc – the Dell Display Manager. Connect your PC and the monitor with a USB cable, and you can use the software on the PC to control how the monitor works, rather than monkeying around trying to press tiny buttons to drive the On-Screen Display menu. You can even set up shortcut keys to make it easier to dive in.

Tidy.

#36: Navigating Windows by keyboard

Designer (19)Now and again, it’s useful to be able to use Windows without mouse or touch, especially should the unexpected happen. Accessibility needs aside, it’s been possible to move around and control Windows since the very early days, just by using combinations of keystrokes.

ALT+F4 is maybe the most memorable (for closing a window), apart from CTRL+ALT+DEL.

A few other window management keystrokes worthy of mention:

WindowsKey+up/down/right/left arrows – maximize the current window to fullscreen (up), back from fullscreen to previous size or minimizes it (down), and snaps the window to one side of the screen or back (left/right).

ALT+TAB / SHIFT+ALT+TAB – cycles through the current open windows (and add SHIFT to go backwards). Releasing the ALT+TAB combo then jumps to whichever window is highlighted; press CTRL+ALT+TAB to just display the open windows, let you move between them and jump to one by clicking on it or pressing ENTER.

ALT+left/right arrow – moves back and forward, as in clicking the back/forward arrow icons in a browser

WindowsKey + number – jumps to the nth application on your taskbar; if you pin an app/window to the taskbar and it stays in the same place so you could use WindowsKey+1 to jump to Explorer, Win+2 to go to the browser etc.

See more here. Many more.

Powered Up

As previous ToWs have mentioned (here, here, here etc), the collection of utilities called PowerToys is well worth installing; one of its default apps is a shortcut guide showing some key WindowsKey + nnn options. (Press WindowsKey+SHIFT+/ to display temporarily).

clip_image002

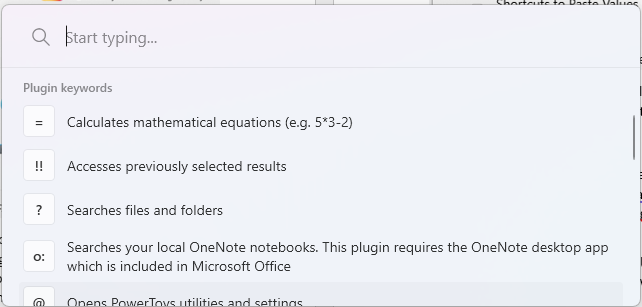
On the topic of PowerToys, one of the utilities is a special “Run” app which does a good bit more than the standard WindowsKey+R command which displays the old fashioned Run dialog;

clip_image004

PowerToys Run has a load of special characters to make special searches; enter ?? something will search the web using your default, or (optionally) put o: something searches your OneNote notebooks for that term.

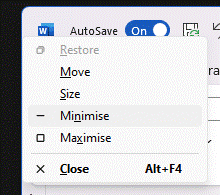
Somewhat controversially, the default activation keystroke for PowerToys Run is ALT+Space, which has been a Windows shortcut to display the context menu of the current window. Pressing that combo followed by M or R would be used to move / resize (using the arrow keys) or N and X would minimize / maximize that window.

clip_image006

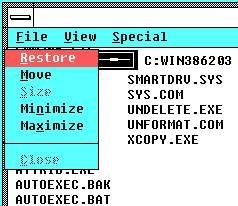
In a curmudgeonly article, El Reg complained that old school keyboard warriors would be most upset. The also suggest that the pre-Win95 icon for that corner of the window was a Spacebar, supposedly to illustrate that you press ALT+SPACE to open it.

clip_image008

Never fear, keyboard fans – you can simply remap the activation key to something else (like WindowsKey+Space) and the ALT+SPACE combo will continue to work like it’s 1987.

clip_image010

673 – Where is my mouse?

clip_image002

The “mouse” was invented 60 years ago, as a means of moving a cursor around on-screen. Through many generations of hardware, it evolved from using wheels to rubbery balls, before eventually going sensor-based and even losing the tail that may have helped coin its original name

Since many people now use laptops with touchpads, they won’t even use an external meecely peripheral but the term “mouse” is still often used to refer to the pointer that it controls. Finding that pointer on your desktop can sometimes be a challenge, especially if you have multiple screens on your computer, and particularly if at least one of them is a snazzy ultrawide job.

mouseyThe free PowerToys addons to Windows 11 includes a section of Mouse utilities; install the full PowerToys suite and you can usually enable each feature individually, and set what mechanism you’d use to invoke it. Perhaps the most useful is the “Find my Mouse” keyboard shortcut – just press the CTRL key twice in quick succession, and the screen dims with a spotlight on where your pointer currently is. Press CTRL once again to remove it and go back to normal.

crosshairsThere are loads of settings to tweak how some of the utilities work – Find my Mouse could be enabled by shaking your mouse if you’d prefer. There’s also a highlighter feature that indicates if you’re pressing a left or right mouse button, or a crosshair view which, when turned on, sets a permanent crosshair display (again, configurable in numerous ways) that remains in place until you repeat the key combo to switch it off.

clip_image008Mice can jump high – who knew?

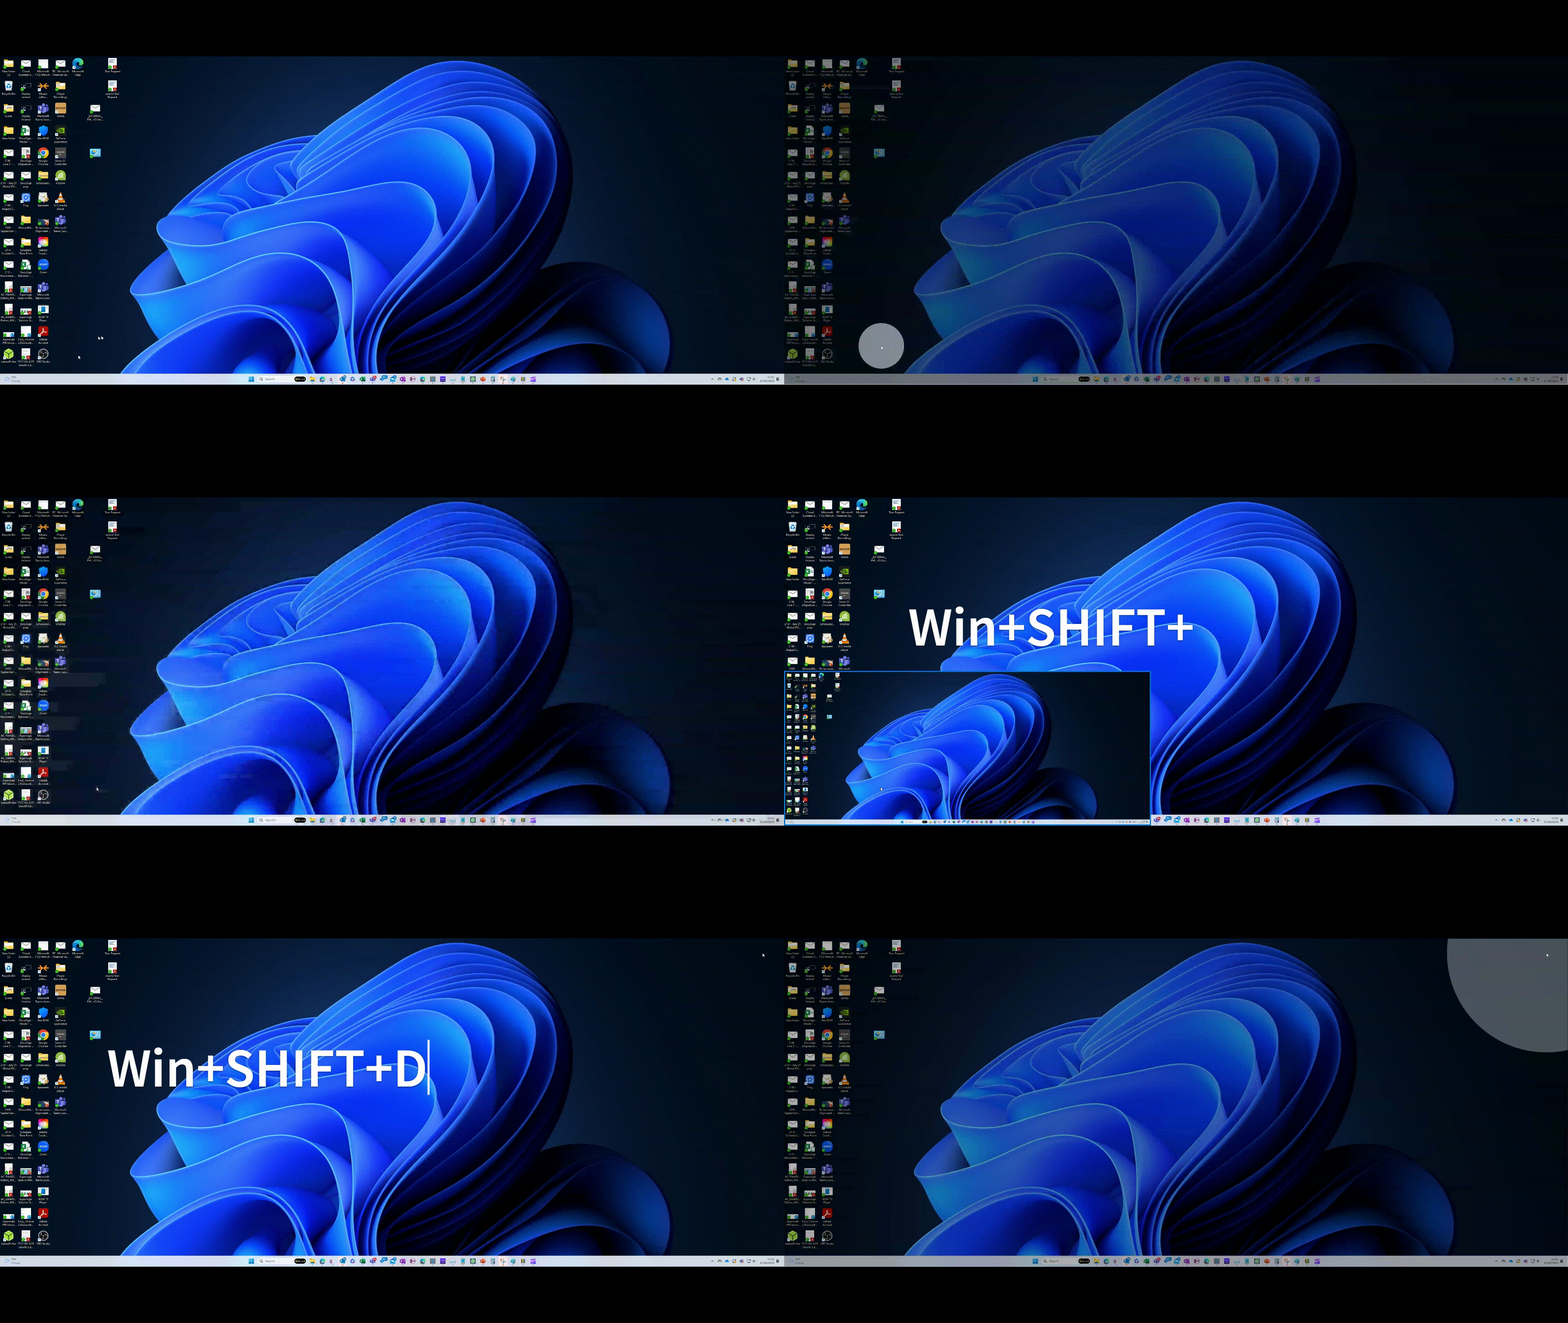
A new mousey feature in the latest release of PowerToys is called Mouse Jump – erstwhile known as FancyMouse – and lets you teleport your mouse pointer from one side of a potentially massive desktop to another.

This is particularly handy if clip_image010you have multiple screens set at different heights, and in order to traverse from one side of the desktop to the other would take you multiple swipes of a physical mouse or strokes of a touchpad.

Press the activation key and you’ll see a shrunken version of the desktop in a small window; click where you want the pointer to vamoose to on that depiction of the display and it will teleport to the other side of the desktop.

safevideoconverter-output

647 – Power of the Toys

imageAfter Windows 95 appeared on 25 August 1995, one of the later updates was to release a bunch of tweaks and addons which had been built to enhance the OS, but not considered mainstream enough to include them in the box – the Windows 95 PowerToys. They included such amazing advances as a round clock, or tools to help manage the country of your modem. Some more history of the PowerToys was covered back in 2005 by veteran commentator Raymond Chen.

In 2019, the Power Toys name was dusted down for a new run at building addins to Windows, this time using an open source approach; the vision document lays out what the team wants to achieve, and they are steadily releasing new versions with fixes, improvements and new features. You can find Power Toys in the Microsoft Store, or if you like to do to prove your geek creds, you can go straight to GitHub and clip_image002download it.

Recently, v0.62 came out and added some new functions, like a draggable box (Screen Ruler) which shows you the exact number of pixels between the start point and the mouse – useful if you’re looking to figure out how large a part of your screen is.

There’s clip_image004a neat Text Extractor tool which can take a selected area of an image and read the text within it straight to the clipboard – handy if you needed to get the serial number from a piece of electronics; take a picture on your mobile of the tiny writing on the back of the device, and quickly extract the details for pasting into some other app or website.

Other PowerToys of note include the Mouse Utilities, which can help find the mouse on screen – a double-tap of the CTRL key and you’ll get a temporary spotlight on the mouse, which can be super useful if you have multiple monitors and are not quite sure where the pointer has gone.

616 – Feature Power

clip_image002The Windows Insiders program which, for a good many years, has provided a way for the product team to develop aspects and features of Windows with the help of millions of early testers, announced some changes in its focus recently. The distinction between Dev and Beta channels will blur to some degree, with A/B testing of new experimental features showing up in Dev before some may make it into future releases.

The path to how new features for Windows 11 will be rolled out is changing a little too. Having previously said that there would be only one Feature Update each year, rather than the spring/fall update cadence that has been with Windows 10 for some time, there are going to be intermediate feature experience packs which will deliver some updates, like the forthcoming Android subsystem which will allow Windows 11 users to install and run a subset of Android apps and games on their PC.

clip_image004If you’re outside of the US, don’t get too excited about the Android apps – the initial preview needs both your PC region to be US and you need an Amazon account in the US, in order to use the Amazon Appstore (which is the home of the subset of available apps). Enterprising tinkerers have found ways to install the software without meeting said requirements – if you choose this rocky path, however, you’re on your own.

If you want some groovy new features for your PC without grubbing around in the command line or waiting for a future update to arrive, do check out the recently-refreshed PowerToys package. The tl;dr history is that PowerToys started as a collection of side projects built during the Windows 95 days, shipped as freebies for power users to play with. The name was dusted down a couple of years ago to collect up similar skunkworks projects for Windows 10 (and now, 11), and has been updated fairly regularly – though the release version is still way off v1.0.

The New PowerToys comprises a collection of addons which will clip_image006be of varying interest to your average Windows user, but some are so neat on the occasions you need them that you’ll be glad of having installed the package. Image Resizer, for example, is a File Explorer extension to kick off resizing a large picture to a more manageable size – handy for the kind of website where you need a thumbnail or a profile picture that’s of restricted dimensions. There are other file-related tools like Power Rename, as well as power usage, window-handling and a whole lot more.

Of particular interest (and most recent) are utilities to do with your mouse – how many times have you tried to find the location of your pointer (especially if you have multiple screens) by waggling the mouse or tickling the trackpad? Press CTRL key twice to Find My Mouse and the screens go dark, except for a spotlight that shines on the current pointer location. There’s a Mouse Highlighter which – when activated via a configurable shortcut key – leaves a little short-lived blob on-screen where you clicked the mouse; great if you’re recording a training video or doing a demonstration.

clip_image008Finally, there’s the somewhat more dramatic Mouse Pointer Crosshairs, which puts a big cross centered on wherever your pointer is, and follows it around. This might be hugely distracting to leave it on all the time, but fortunately, a quick press of the shortcut key will turn it off.

The PowerToys use a lot of different shortcut keys – some configurable – and also have a handy Shortcut Key guide, which displays common Windows shortcuts; none of those used by the PowerToys themselves, though.

520 – You have the Power

clip_image002When Windows 95 launched nearly a quarter of a century ago, it brought a whole new way of interacting with the windowing environment on users’ PCs. The Start menu was introduced (and the grand launch event had the execs “dancing” to ‘Start Me Up’ by the Rolling Stones – chosen because of its “Start” association, presumably, rather than the lyric “you make a grown man cry”), and after a short-term diversion in Windows 8, the Start menu reappeared in Windows 10, and is still evolving.

After the Win95 initial release, the development team behind the Windows Shell came out with a bunch of useful utilities; things that at one point might have shipped as Resource Kit tools, but were aimed at a slightly broader user base – and so the Power Toys family was born.

There were often capabilities in the OS which could be enabled or disabled by the flick of a setting in the Registry (also new in Windows 95, in an attempt to put all the settings stuff in one place rather than having INI files everywhere). Telling an end user to go an start Registry twiddling is a potential recipe for disaster, so the Power Toys included utilities like TweakUI, which exposed some of the settings.

Various other Microsoft products embraced the idea of Power Toys, but the whole thing was killed off in the wake of the intensive code reviews required as part of the Trustworthy Computing (TwC) initiative in 2002. See more of the history here (though the page is 15 years old so pretty much all the links are dead).

In late 2019, it was announced that PowerToys was coming back – this time, as an open source project supported by the dev team but ultimately driven by a wider community. The goals for v1.0 have been published and recently the 0.15 release was made – get the latest version here.

So far, possibly the most useful app in the current build is FancyZones, which allows you to have more control over window layouts than simply snapping to the left or right – handy if you have a massive monitor or two, and want to tile multiple windows side by side.

clip_image004