|
When moving between countries, one of the tricks the traveller needs to decide is how to handle the switch of time zone. Do you set your watch to the destination time as soon as you board the plane, or only when the pilot announces, in his or her ever-so distincive pilot tone, what the local time is on arrival? If pilots all sound the same, what about air-traffic controllers? Also, do you wait for your phone to pick up the destination time zone automatically, or do you set it manually? If you have a Fitbit or other wearable, do you want it to pick up the time from your phone or do you force it on departure? Decisions, decisions… Frequent travellers tend to have pearls of wisdom on how to deal with jet lag – like get your mind in the destination time zone and keep it there (ie. If you’re out having dinner after arrival, do not keep saying that it’s really 4am; it’s 8pm now and you can’t go to bed for at least another two hours), or get the sun – or even a bright light – on the back of your knees. It’s a lot easier to handle the differing time zones using your PC…
If you’re booking a load of appointments in another time zone – eg. you’re working in another country for a few days and creating appointments with people in that locale – then it’s even worth switching the TZ of your PC whilst you do the diary-work, to save a lot of clicking around in setting the appropriate time zone specific to each meeting. The best way to do this would be to show your second time zone in the Outlook calendar – in the main Outlook window, go to File | Options | Calendar and select the second one to show; when you’re ready to switch between your local TZ and the remote one, just click the Swap Time Zones button to switch the PC (and Outlook) between the different zones.
If you’re going to use the time zone swapping in Outlook as per above, switching time zones before you actually travel, then it’s worth disabling the automatic mode as Windows can get itself properly confused; the default time zone will change, and Outlook will end up showing the same time zone for both primary and secondary.
The Alarms & Clock app in Windows 10 shows a map of the world with your choice of locations, and the moving daylight line so you can see what’s happening around the globe. A good alternative to that exec boardroom display nonsense, that you might expect to see gracing the wall of your average corporate hot shot.
|
Tag: Windows 10


Tip o’ the Week 478 – O365 and Windows’ Mail and Calendar
|
The genesis of Outlook on the phone as we know it today, is perhaps the acquisition of a company called Accompli 5 years ago, and a great deal of refinement and effort since.
e.g. Hit WindowsKey+R then enter outlookcal: and you’ll jump straight into the Calendar app. Both have come a very long way – at first release, they were pretty basic, but they’re now so well featured that most people could use them as their primary email and calendar apps, most of the time.
Go into the settings on the Calendar app, then Manage accounts, then + Add account… or just Win+R then outlookaccounts: and you’ll be able to add your Office 365 account onto both Mail and Calendar. If you have multiple calendars connected – like home Office 365, Gmail or Outllook.com accounts as well as your corporate one – you could selectively enable them for display in the app, and the set of calendars that are shown will also appear in the agenda if you click on the clock / date on your taskbar. You can also see your upcoming appointments in a live tile on the Start menu, if you still use such things.
You’ll also see your next appointment on the Windows Lock Screen if you have it enabled under Lock screen settings. You may want to go into the Notifications & actions settings page (just press Start and begin typing notif…) and turning off Calendar notifications, or you’ll get a blizzard of reminders from desktop Outlook and the Calendar app. |


Tip o’ the Week 465 – Cortana, remind me To-Do sync
|
In fact, the Store listing name for To-Do is now appended with some additional context of what it can now do, at least if your language is English and you’re in US, UK, India or Australia.
Cortana’s past tells a good story, and her future is changing somewhat – after deciding to stop positioning her as a potential competitor to Amazon Alexa or Google assistants, a forthcoming release of Windows 10 will break the bond between Windows Search & Cortana, and the voice prompts from Cortana during Windows Setup will be silenced when installing a non-Home version of Windows too. |


Tip o’ the Week 464 – Previewing PDFs
|
If you spend time handling files in Windows Explorer (or File Explorer, as its now called), you’ll likely be fam If dealing with photos, particularly, it’s great to show extra-large icons But when dealing with many pictures where you could be looking for subtle differences in multiple similar files, or if browsing documents that you want to quickly identify without having to open them all up, the Preview Pane becomes very useful.
It’s especially so if you resize it to be more like 50% the window width, when you may want to read the first chunk of a document rather than just see its general shape.
Even if you like using the default PDF viewing facility in Edge browser (or favour some other reader): in order to preview within Explorer, you’ll need to have the Adobe Acrobat Reader installed, though it doesn’t have to be the default app to handle PDFs.
|


Tip o’ the Week 458 – Grabbing pictures from websites
|
Legitimate examples might include things like downloading a company logo from its website so you can include it in a PowerPoint slide; try going to just about any major company site and you’ll probably find it’s not straightforward to save the image file. Ditto all sorts of clever pages that might stop you simply saving the picture to your PC.
If you want to grab the actual URL for an image on a web page, the The Inspect Element funciton in browsers is designed to help web page debugging; it’ll let a user or designer jump straight to the section of a web page’s source, and inspect or even modify the code behind the page.
Look for the src= part, double-click on it and you’ll see the URL of the image in an editable text box, meaning you can easily copy that to the clipboard and get ready to paste it wherever you need it
Using a search engine Of course, there may be easier ways to get an image – using Bing or Google search, for example. Bing is actually quite a bit better in this regard. When you click on an image in the results from Bing’s Image search, you’ll see a larger preview of the picture along with a few actions you can take – like jump to the originating page; search for other sizes of the same image; use Visual Search to run a query on just some selectable portion of the image; or simply just view it in the browser, thereby opening just that image and showing you the direct URL to it. In the case of both Google and Bing, if you click on “Share”, then you’ll get a link to the search result of that image rather than the picture itself – so if your plan is to embed the image in another web page or upload it to some other place, then you’ll be frustrated.
Simply choose Upload picture, paste in the URL of the logo you want to use and you’re off to the races. Figuratively speaking, anyway. You might have to jigger about with the proportions of the image by downloading it first and editing it elsewhere, as the image will need to be more-or-less square. Built-in icons in Teams appear to be 240×240 pixels in size so you could try to target that if you’re resizing. |


Tip o’ the Week 457 – Clipboard improvements
 Windows 10’s latest update – the October 2018 Update – has now started rolling out again, after a series of issues reported by some users about data going missing. Here’s how to get it if you don’t have it already and don’t want to wait until it trundles along via Windows Update. Windows 10’s latest update – the October 2018 Update – has now started rolling out again, after a series of issues reported by some users about data going missing. Here’s how to get it if you don’t have it already and don’t want to wait until it trundles along via Windows Update.
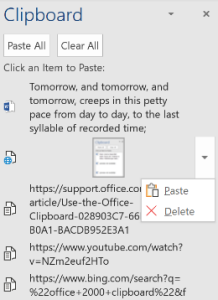
One of the neat new features is a revamped clipboard – something that has been tried a few times before, supporting additional features like keeping a history of what you clip, and/or allowing clips to roam across different machines. This has at times been achieved in standalone apps (eg via The Garage), or through individual apps managing the process – did you know, for example, that Office had a clipboard that supported
In Windows 10 with the October 2018 update (version 1809: to check your version, press WindowsKey+R then enter winver), there’s a new paradigm for managing the clipboard right across Windows applications – and it harks back to the old CTRL-V key combo that is more than 50 years old itself… from ToW #133 (from mid-2012): CTRL-V goes back a loooong way. Its first use was years ago in the “Quick Editor” – aka QED – co-developed by Butler Lampson, one of the giants of computer history, now employed as a “Technical Fellow” in Microsoft Research.
|
 And it’s
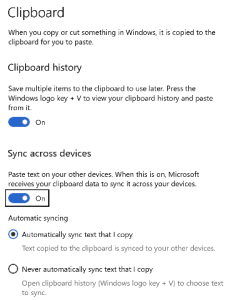
 mechanism is an opt-in arrangement, where you can carry on using the one-hit clipboard as normal, or you can enable history or even cross-device Syncing to allow multiple machines to get the same history, just like browsing history, Timeline etc can roam across different machines if you wish.
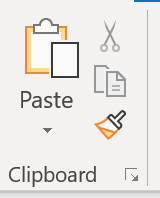
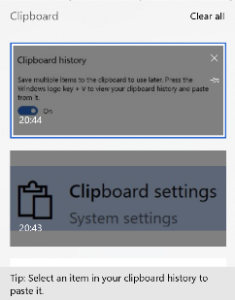 To access the new Clipboard UI, press WindowsKey+V. There isn’t much obvious control over the experience (other than enabling it via Settings).
Tip o’ the Week 456 – Alexa on PC
|
Amazon meanwhile has brought the Alexa app to the PC, not just on select new machines but for everyone running the latest release of Windows 10. See here to install. This gives you the option of talking to your PC to control the plethora of 3rd party devices that support the Alexa ecosystem, as well as all the other stupid stuff you might ask of Alexa already. Find out more, here. |
![clip_image002[4]](https://msdnshared.blob.core.windows.net/media/2018/11/clip_image0024.jpg "clip_image002[4]")
Tip o’ the Week 455 – Pin your PMAs
|
Microsoft published a bunch of 3rd party PWA apps directly into the Microsoft Store (eg start with SkyScanner then click on “Microsoft Store” when opened with the Store app itself rather than the web UI), though there haven’t been any new ones for a while. Google is also throwing its weight behind PWAs – so much so, that version 70 of the Chrome browser has support for PWAs that can be installed to look like a desktop app on Windows, so when the PWA is running it hides the browser UI and is launched from either within Chrome directly, or from the traditional Windows app UI.
To look for dedicated PWA resources, check out this list, or look here, here or here. |


Tip o’ the Week 454 – Time Zone Tumult Ahead
|
Many Southern Hemisphere nations have already moved into “summer time”, though a few will make the transition on 4th November. Europe, most of Mexico and parts of the Middle East will move out of DST this weekend, but most of the North America and the Caribbean will “fall back” the week after. See the list of places that currently observes DST and when they transition. This can play havoc with people’s electronic calendars; systems these days generally take notice of time zone changes pretty well and that means the relative times of meetings are preserved, though what this does mean is that a 9am meeting organised in Seattle (and therefore hosted in Pacific Time) will be 5pm for attendees in London this week, but it would be 4pm GMT the week after, then back to 5pm after that, as the US moves clocks back. This topic was covered 3 years ago in ToW #301, and most of the tips contained therein are still valid today. Maybe future generations will stop the winter/summer time flip-flop effect altogether (Californians get to vote on whether to join their neighbours in Arizona, by staying on the same time zone all year, and the EU may stop the practice of changing clocks too). In the meantime, for a few weeks a year, those of us who deal cross-border may need to think a bit more about what the time is in our neighbour’s locale.
One further innovation since the last time this topic was aired, is that Outlook now lets you show a third time zone in calendar if you so desire. |


Tip o’ the Week 449 – Snipping Tool gets the snip
 As mentioned in ToW #447, there are some tweaks coming in the Windows 10 October 2018 update, which might be with us sooner than you think.The old Snipping Tool (not to be confused with the similar screen snipping utility that’s installed if you have OneNote 2016, activated by pressing WindowsKey+S) is going away, and giving way to a new program. And some people aren’t happy about it (in fact, if this was a story which features on the sponsored clickbait tiles on the Edge browser homepage, it’d be described as Microsoft Has a New Trick, and These People are Furious About It…). As mentioned in ToW #447, there are some tweaks coming in the Windows 10 October 2018 update, which might be with us sooner than you think.The old Snipping Tool (not to be confused with the similar screen snipping utility that’s installed if you have OneNote 2016, activated by pressing WindowsKey+S) is going away, and giving way to a new program. And some people aren’t happy about it (in fact, if this was a story which features on the sponsored clickbait tiles on the Edge browser homepage, it’d be described as Microsoft Has a New Trick, and These People are Furious About It…).
If grabbing a free-form selection, once you’ve more-or-less completely made a shape and when you release the mouse button Despite the fact it’s a Modern App and People With Too Much Time On Their Hand Think This… is a bad thing, it’s actually pretty snappy and provides a useful polish to one of the more esoteric but handy features in Windows.
Of course, another method (useful in the preparation of this very note) is to rely on the old PrntScn button, the pressing of which dumps the contents of the screen – floating toolbars and everything – straight into the clipboard. Paste the contents into MSPAINT, then use the Snipping method above to grab the relevant section of your screen grab, and you’re sorted. |
 The new
  olbar at the top of a greyed-out screen, making it quick and easy to either grab a rectangular portion of the screen, a free-form selection, or the whole screen itself.
 you’ve been holding down, then a large “toast” appears in the bottom right of the screen advising that it’s now in the clipboard. If you click on that,
 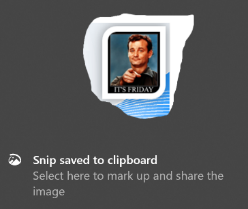 you’ll be launched into the Snip & Sketch app, where you can do various tweaks to your grab, save it, share it and so on. An alternative to the Win+S method of invocation is to go into Snip & Sketch to start with, and initiate a new screen grab from there.
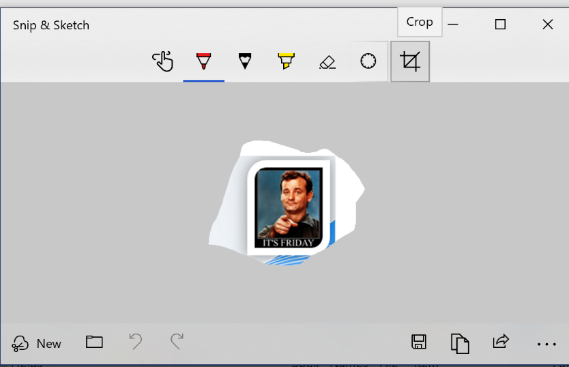 Handy especially if you prepare any kind of training documentation, or you’re stupid enough to send out a weekly tips email to thousands of people for 9 years.